Last year, Thomas and I found this "spell book" at Hallmark. If the link doesn't work (and that's a very real possibility), it's a hollow box, decorated to look like a Witch's spell book. You fill it with candy, and can use it instead of a trick-or-treat bucket. They talk, too, which is really cute. I considered getting one, but they were around twenty bucks, and were just a little too cartoony for my taste. I gave it some thought, and realized it could probably make a more realistic one for a lot less money. I mean, it wouldn't talk, but it would still look really cool, and that's what mattered. This year, I got to work, and can now proudly show you my creepy book of candy spells! But first, let's see how you can make one, too:
First, I started with a store-bought hollow book. This one cost about $5.99 at Ross. It's probably around 8 or 9 by 12 or 13 inches. I didn't measure it, but it's not much larger than a sheet of printer paper. It's probably about 1.5 to 2 inches deep. That's enough to hold plenty of candy.
 |
| Nice enough, but not really the look I was going for. |
 |
| Inside the "book" |
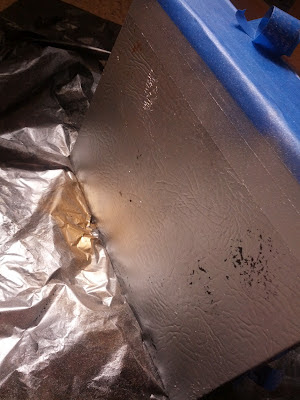
Once I had the base coat on and it had dried, I taped off the areas I wanted to keep black (the spine), and sprayed the rest of the book silver. Thankfully, it was a lot easier to work with.
 |
| The darn thing still sticks to everything, and you can see where some black is already showing through. I kind of like that, though. Gives it a little age. |
See?! Again, that black was awful, so I had a little bleed through and smudging, but overall, I'm really pleased with how it turned out. I did the same pattern on the back of the book, as well. Okay, to be perfectly honest, I did the pattern on the front of the book, as well. I accidentally did the back, thinking it was the front. I was going to leave the back silver. Oops.
Then, to add a little interest, I brushed some gold leaf I had leftover from another project onto every other gold diamond.
 |
| Here's the leaf. I don't remember how much it was, but it wasn't very expensive. It came from Michael's. |
 |
| And here's the book with the gold leaf. |
After everything dried, I used a glue gun to add some jewels to the spine, and a label on the front. The label came from Hobby Lobby, in a pack of four. This is the original placement. I didn't like it, so I moved it over later, as you'll see in the final pictures.
As a finishing touch, I used a little more of the liquid leaf to freehand a title onto the spine of the book. I tried to mimic the lettering in the label. Thomas and Ronnie decided to photobomb, I guess.
And here is the mostly-finished product, on the mantle with the rest of the Halloween decorations. I say "mostly-finished" because I still need to clear-coat it. that black paint is ridiculously sticky and stains my hands when I touch it.
Thanks for making it all the way through this! I hope you enjoyed it, and please let me know if you try this yourself. I'd love to see pictures!


No comments:
Post a Comment
Add your own ramblings, musings, or existential ponderings here--just keep it clean and keep it kind.