Well, another month has flown by. My brother starts high school in a couple of weeks, and there are only 69 more days until Mickey's Not-So-Scary Halloween Party. Seriously, where has this year gone?
Anyway, old lady moment aside, here are the products I gravitated toward the most this month. I normally try to choose two items for each category, but this month, I had some clear favorites that blew everything else out of contention. I hope you enjoy!
Eyes
Benefit Creaseless Cream Eye Shadow in Sippin' and Dippin'
I know, I picked this last month, but you know what? It's still awesome. In addition to being a pretty color on its own, it works really well as an eye shadow base. The golden peach shows nicely through bronze shades.
Stila Eye Shadow in Sparkle
Speaking of bronze shades, this is my favorite to layer over the Benefit. It's not glittery, but just shimmery enough to catch the light, and looks fantastic sheered over the lid. Also makes a nice, subtle crease color.
Lips
Revlon Lip Butter in Peach Parfait
I just posted about this the other day, and I can not get enough of this color. I won't bore you with my ravings again. Just go get one.
Face
Rimmel Stay Matte Shine Control Pressed Powder in Transparent
I know I've mentioned this product a bajillion times on here. I keep one in my personal stash and one in my film kit. It is the best setting powder I've ever used. I've tried Urban Decay, Bare Minerals, MAC, Clinique...you name it, and keep coming back to this drugstore pick.
Urban Decay All-Nighter Setting Spray
There is a post coming on this, but here's the short of it: it's supposed to keep makeup from melting off, and it actually does. The end.
Nails
China Glaze in Rainbow
I've really been impressed with China Glaze. I'd never tried them before the Hunger Games polishes came out, and now I can't get enough! This color is an iridescent pink opal that lasts for ages, even without a top coat. Perfect for lazy bones like me.
Body
Ahava Velvet Cream Body Wash in Hibiscus and Fig
This came in my Glossybox, and I've really enjoyed it. I'm seriously thinking of repurchasing when I run out. A travel-size (like I have now) is only $7 at Ulta. That's definitely reasonable.
Satin Care Shave Gel with a Touch of Olay
I've been looking for a good shaving cream ever since my favorite Soap & Glory disappeared, then reappeared at a much higher price. This is it. It's moisturizing, doesn't goop up on the razor, and keeps down nicks and cuts. It's a keeper, and only a few dollars at the drugstore.
Tuesday, July 31, 2012
Disney Artist Collection Heads To Target
 |
| Photo Credit: Target |
The collection is a line of fashion tees and sweats (yes, fashion sweats. Sounds like an oxymoron, but these are too darn cute) featuring both favorite and slightly more obscure Disney characters. Think: Oswald, Cleo, Figaro, Sleepy, Butch, that girl fawn from Bambi (I should have my Disney fan card revoked), and images from Silly Symphonies. Mickey and Minnie also make an appearance, and I left the store last night with a Tinkerbell sweatshirt. Prices range from around $12 up to around $25. I'll be honest, I can't remember off the top of my head, and the Target website isn't being helpful. The sweatshirt I got was $19.99. Items are available for women, men, and children, and selection varies by store.
Monday, July 30, 2012
'Cause Duct Tape Was Too Sticky: DIY Eye Shadow Repair
I'm a klutz, pure and simple. I've fallen down stairs so many times I've lost count, and once, the stairs fell out from underneath me. Folks, that takes talent. I am so accident-prone, I've elevated it to an artform.
Because I have a tendency to drop, throw, and generally mangle objects, I've had to learn how to either deal with or repair the end results. Over the weekend, I learned how to salvage broken eye shadows, and I thought some of you might be interested. I like to think that the world is full of other klutzy people, too.


Because I have a tendency to drop, throw, and generally mangle objects, I've had to learn how to either deal with or repair the end results. Over the weekend, I learned how to salvage broken eye shadows, and I thought some of you might be interested. I like to think that the world is full of other klutzy people, too.
 |
| Left: Cranberry. Right: Woodwinked. |
Here are two of my favorite MAC eyeshadows, Cranberry and Woodwinked. Woodwinked has been broken practically since I bought it ages ago, and Cranberry bit the dust a few months back. Both have become increasingly difficult to use, and I was considering replacing them. The thing is, both are still full of product, and it seems like a waste of money to repurchase something that you still kind of have.

So, instead, I stabbed them. Hacked them right to pieces! I just grabbed a kitchen knife and went to town!

Okay, so, really, I just broke the shadows into smaller chunks, so when I get to the next step, they'll be dissolve more quickly and be easy to stir.

That's where the alcohol comes in. Everyone drink up!! Next round's on...no, wait, nevermind. Wrong kind of alcohol...sorry.

For this DIY project, you'll need rubbing alcohol, with the highest percentage you can find. The higher the alcohol content, the faster it will evaporate. The faster it evaporates, the sooner you can use your eye shadows.

Add a drop or two of alcohol at a time to the broken shadow, and stir. I used a clean, sanitized bobby pin to stir with, and that worked really well. Keep adding alcohol and stirring until the shadow is completely dissolved. My alcohol bottle came with a spout, but an eye dropper would probably work as well, if not better (most likely, better).

Once the shadows are dissolved, you just have to wait. Make a sandwich. Check your Facebook. Write a novella. Call your mom. Clean your room. Have you seen it lately? It's a sty. You can barely tell there's carpet underneath all the clutter. Just wait until your father comes home, young lady!

*Ahem* Sorry about that. After a few minutes, when things have started to solidify slightly, give the bottoms a tap or two to help smooth out the surfaces. You might want to repeat this several times throughout drying, but it's not something you need to worry about too much. I tapped the bottoms anytime I walked by the table, and forgot about it, otherwise.

This is my finished repair. Sure, the surfaces could be smoother, but for my purposes, they're just fine how they are. If it means that much to you, though, you can press the surfaces by laying a paper towel across the tops of the shadows, setting a coin the size of the surface area on top of the towel, and applying pressure. To me, that just seems kind of unnecessary. I'm just going to mess it up with a brush, anyway. All told, this took about ten minutes (maybe) to prep, with a drying time of about four hours.
 |
| Top: Woodwinked. Bottom: Cranberry. |
In case you're wondering how this affects the shadows, themselves, here are swatches of the final products. The lighting is horrible, which makes the Cranberry look kind of orange, but I think you can tell from the Woodwinked that they swatch beautifully. They're as good as new, with no change in color.
 |
| Small Pans. Left: Pink Opal, Right: Deck Chair. |
I also learned that this method works amazingly on MAC pigments. Normally, those are packaged loose, in big, non-travel friendly pots. I added a small amount of pigment to an empty pan I got with my Z-Palette, followed the same instructions, and ta-da! I now have palette-friendly, travel-friendly sizes of Pink Opal and Deck Chair (discontinued. I'm sorry). I popped a magnet on the back of each and tossed them in my Unii Palette, since I use it more often. You could even use this technique to mix together your own custom colors, if that's your thing. It's worked so well that I'm planning to purchase some pigment samples from All Cosmetics Wholesale to DIY myself an eye shadow palette.
Was this helpful? Let me know in the comments. Thanks!
Friday, July 27, 2012
Frugal Friday: Sinfully Smashing Gold Glosses
The other day, I was walking through Walgreen's and noticed that they stocked Sinful Colors lip glosses*. I knew about Sinful Colors nail polishes, through my little niece, but had no idea they made a lip gloss. I'm probably just behind the times, but I thought I'd pick one up to see how it fared. The three available colors were a light lavender, white-ish clear, and a pale gold shimmer. I went with "Peachy Sheen", the pale gold shimmer.
Once I got home, I realized that I already had a pale gold shimmer in a Smashbox deluxe sample. For fun, I thought I'd see how the $2.99 drugstore gloss did against the fancy-schmancy, $19.00 high-end one (full-size is a good bit larger than the one you see here). You might be surprised, so stay tuned!
Let's start with some swatches. Here they both are, straight out of the tubes:
The Smashbox Reflection High Shine Lip Gloss in Star is thicker, and the Sinful Colors has a teeny bit more yellow to it. They both sparkle nicely, though you do have to pack on the Sinful Colors. The Smashbox only needs a dab to cover well. I will say that the Smashbox took forever to wipe off my arm, but more on that in a minute. Here are the same glosses, this time swatched on my lips:
At first glance, there's not much of a difference, is there?
The Smashbox has more glitter, and I didn't need much product to coat my lips. The Sinful Colors, again, had to be piled on, and the shimmer is much more subdued--there aren't any chunks, in the Smashbox. That said, the Sinful Colors is much more comfortable on my lips. The Smashbox is so thick, sticky, and sweet, that it felt almost like I'd smeared Kayro Syrup all over my lips. Even after tissuing the gloss off, I still had to use a face wipe to remove the residue and remaining glitter. It's long-wearing, but feels awful. The Sinful Colors felt silky and moisturizing, even after the shine had worn off. I did have to reapply frequently, though, and the smell and flavor are a little too chemical for my taste.
Honestly, I don't think one is better than the other. I think they're both great for different purposes. The Smashbox is a great gloss...for camera. Of course, that's where Smashbox excels, so that only makes sense. Once that gloss is on, it's on, and it's going to look beautiful and perfect for as long as you need it to. That's awesome for a photo shoot; not so great for a date night. You definitely don't want to kiss anyone while you're wearing it. Brides, steer clear of this one for the big day (but go for it for pictures!).
If you're not looking for something for camera, go with the Sinful Colors. It's a heckuva lot cheaper, just as pretty on, and feels a lot more comfortable. True, there's less glitter, but the shimmer is lovely, and a lot more wearable.
Nutshell Review of Sinful Colors Lip Gloss in Peachy Sheen
Pros: Moisturizing, silky feel, pretty shimmer, lovely packaging, super affordable
Cons: Not a lot of color payoff, not long-wearing, odd flavor/smell
Final Verdict: 6 out of 10. It looks and feels nice, and for $2.99, you could do a lot worse.
*I'm not linking to the Sinful Colors site because it's still under construction, and Walgreen's doesn't have this product online. Actually, I haven't found it anywhere online. If you spot it, please let me know in the comments.
Once I got home, I realized that I already had a pale gold shimmer in a Smashbox deluxe sample. For fun, I thought I'd see how the $2.99 drugstore gloss did against the fancy-schmancy, $19.00 high-end one (full-size is a good bit larger than the one you see here). You might be surprised, so stay tuned!
 |
| They don't look it, here, but just wait. They match up pretty nicely. That Smashbox reallly does have gold running through it. Also, I really need to clean off my dresser... |
 |
| Left: Smashbox, Right: Sinful Colors. |
 |
| Smashbox |
 |
| Sinful Colors (apologies for it being slightly out of focus. I had no idea until I saw it here) |
The Smashbox has more glitter, and I didn't need much product to coat my lips. The Sinful Colors, again, had to be piled on, and the shimmer is much more subdued--there aren't any chunks, in the Smashbox. That said, the Sinful Colors is much more comfortable on my lips. The Smashbox is so thick, sticky, and sweet, that it felt almost like I'd smeared Kayro Syrup all over my lips. Even after tissuing the gloss off, I still had to use a face wipe to remove the residue and remaining glitter. It's long-wearing, but feels awful. The Sinful Colors felt silky and moisturizing, even after the shine had worn off. I did have to reapply frequently, though, and the smell and flavor are a little too chemical for my taste.
Honestly, I don't think one is better than the other. I think they're both great for different purposes. The Smashbox is a great gloss...for camera. Of course, that's where Smashbox excels, so that only makes sense. Once that gloss is on, it's on, and it's going to look beautiful and perfect for as long as you need it to. That's awesome for a photo shoot; not so great for a date night. You definitely don't want to kiss anyone while you're wearing it. Brides, steer clear of this one for the big day (but go for it for pictures!).
If you're not looking for something for camera, go with the Sinful Colors. It's a heckuva lot cheaper, just as pretty on, and feels a lot more comfortable. True, there's less glitter, but the shimmer is lovely, and a lot more wearable.
Nutshell Review of Sinful Colors Lip Gloss in Peachy Sheen
Pros: Moisturizing, silky feel, pretty shimmer, lovely packaging, super affordable
Cons: Not a lot of color payoff, not long-wearing, odd flavor/smell
Final Verdict: 6 out of 10. It looks and feels nice, and for $2.99, you could do a lot worse.
*I'm not linking to the Sinful Colors site because it's still under construction, and Walgreen's doesn't have this product online. Actually, I haven't found it anywhere online. If you spot it, please let me know in the comments.
Thursday, July 26, 2012
Dear Santa...
Wednesday, July 25, 2012
Catching Up With the Mad Man in the Box
Oh, this news made my day!! This August, BBC America is scheduled to run four Doctor Who specials, in preparation for the Fall start of the seventh series!!
They did this last year, with three specials designed to act as a "memory jog". This time, the DW folks aim to marry the sci-fi with the sci-non fi, to create a laid-back, fun, but educational viewing experience. Here's the schedule:
August 4th, 11:00 PM (not sure of time zone. My guess is Eastern): The Science of Doctor Who.
Find out the real science behind "wibbly wobbly timey wimey".
August 11th, 9:00 PM: The Women of Doctor Who.
Yes, that sounds like a centerfold spread, but these chicks mean business! Learn about the ladies who can run through corridors backwards and in high heels.
August 18th, 11:00 PM: The Timey-Wimey Stuff of Doctor Who.
Trying to figure what happened when? This might help.
August 25th, 9:00 PM: The Destinations of Doctor Who.
Take a closer look at the Doctor's passport.
In addition, BBC America has released a series of teaser posters that are simply stunning. Click here to see them all (and turn them into desktop backgrounds, if you're like me).
***UPDATE! Thanks to eternaly relyneat, I can tell you that the first episode of the new season should air August 25th, as well. Thank you!!! (You have an awesome name, by the way.)
***UPDATE X2! Looks like it will air around that date...but not here. Season 7 will premier at the Edinburgh International Television Festival. Read all about it here. Thanks, eternaly relyneat, for the update! :)
They did this last year, with three specials designed to act as a "memory jog". This time, the DW folks aim to marry the sci-fi with the sci-non fi, to create a laid-back, fun, but educational viewing experience. Here's the schedule:
August 4th, 11:00 PM (not sure of time zone. My guess is Eastern): The Science of Doctor Who.
Find out the real science behind "wibbly wobbly timey wimey".
August 11th, 9:00 PM: The Women of Doctor Who.
Yes, that sounds like a centerfold spread, but these chicks mean business! Learn about the ladies who can run through corridors backwards and in high heels.
August 18th, 11:00 PM: The Timey-Wimey Stuff of Doctor Who.
Trying to figure what happened when? This might help.
August 25th, 9:00 PM: The Destinations of Doctor Who.
Take a closer look at the Doctor's passport.
In addition, BBC America has released a series of teaser posters that are simply stunning. Click here to see them all (and turn them into desktop backgrounds, if you're like me).
 |
| Photo Credit: Screen Rant |
***UPDATE X2! Looks like it will air around that date...but not here. Season 7 will premier at the Edinburgh International Television Festival. Read all about it here. Thanks, eternaly relyneat, for the update! :)
Tuesday, July 24, 2012
Just Where Do You Find Mascara In a Zombie Apocalypse?
Normally, around here we talk about how to look pretty and polished. That's all well and good, but it's not all that you can do with makeup and hair products. Sometimes, you just need to get down and dirty...you know, without the actual dirt. Ew.
I have lost count at how many zombies I've filthied up. Sure, on The Night Shift they were all cute and cuddly, but they still had to look like they'd been underground. I've given people bruises and bloody lips (and only once or twice were they real), added gaping wounds to pretty girls, and made enough blood for a bathtub dismemberment. Sometimes, folks need to look sweaty and grimy, or like they've just been pulled through the mud (or come down a chimney, but that's one for another day, I think). When you're on a set, you don't always get to be glamorous.
Now, as I've said a million times before, I'm not a pro. I've just worked with pros and paid attention. These artists, however, are pros, and do some of the best work in television. Here's a fantastic interview with the hair and makeup team from The Walking Dead. Enjoy! (Click the "These artists" link for the interview. Whoops!)
 |
| Photo Credit: Bloody Disgusting and all the AMC stuff written on the bottom of the picture. :) |
Monday, July 23, 2012
Luxury Look-Alikes: NARS Orgasm vs. Revlon Peach Parfait
You know how NARS Orgasm (sorry, Mom!) anything is an instant cult favorite? Well, I found a drugstore product that could easily drink the kool-aid and fit right in. Right now, NARS has two individual blushes, a blush palette, a bronzer duo, an all-over stick (The Multiple), an illuminator, two lip glosses, and a nail polish. You know what they don't have (I mean, besides a partridge in a pear tree)? A lip butter! You know who has one that's a dead ringer* for Orgasm (sorry, Mom!)? Revlon!
I'm not even slightly kidding, folks. It's pretty startling how much these look like each other.
The color is Peach Parfait, and is the shade worn by Emma Stone in the advertisements. The ad image looks nothing like the real deal, and actually almost kept me from buying this. It looks beautiful on her, but the color in the ad looks like an orangey peach. In reality, it's more of a golden peachy-pink.
Folks, it's the same color. Flat out. If you are a fan of the Orgasm line, but want something other than a gloss on your lips, snap up Peach Parfait. It's a universally flattering color that will be just as appropriate this Fall and Winter as it has been this Spring and Summer. Added perk: it's roughly a third of the cost of a NARS gloss.
Anybody else have a find, dupe, or must-have they want to share? Leave it in the comments. Thanks!
*Note: This is not a dupe for anything in the NARS Orgasm collection. It's simply the same color as everything in that collection. I repeat: there is not a lip butter in the collection, and this is not a dupe for the glosses. Thank you, The Management.
P.S. Do you know how hard it was to come up with a title for this that didn't involve both "orgasm" (unavoidable) and "fake", or worse, "butter"? This could have shown up under some very interesting Google searches...yikes...
I'm not even slightly kidding, folks. It's pretty startling how much these look like each other.
 |
| With my well-worn, de-potted NARS Orgasm (sor--oh, you get the point...) |
 |
| With my newer, still in the packaging, NARS Super Orgasm. |
.jpg) |
| Credit |
 |
| Swatched on my lips. You can see that it's much less opaque, pinker, and has tiny flecks of gold running throughout. |
Just to drive the point home, I used NARS Orgasm in all of my makeup today. I layered NARS Orgasm illuminator over a golden peach eyeshadow base (Benefit's Creaseless Cream Eye Shadow in Sippin' 'n' Dippin'), and underneath a light dusting of NARS Orgasm blush. Highlights courtesy of Stila Kitten eyeshadow, and bronzer by Too Faced in Sun Bunny. There were other products involved, but those are the only real "color" items.
 |
| Might I add, it's hotter than Hades with a million percent humidity. I gave up on my hair around July 7th or 8th. I'll care again in October. |
Anybody else have a find, dupe, or must-have they want to share? Leave it in the comments. Thanks!
*Note: This is not a dupe for anything in the NARS Orgasm collection. It's simply the same color as everything in that collection. I repeat: there is not a lip butter in the collection, and this is not a dupe for the glosses. Thank you, The Management.
P.S. Do you know how hard it was to come up with a title for this that didn't involve both "orgasm" (unavoidable) and "fake", or worse, "butter"? This could have shown up under some very interesting Google searches...yikes...
Friday, July 20, 2012
What's In the BAG??!!!!!!
*Editor's Note: This post was originally planned to contain a list of fake spoilers to The Dark Knight Rises, such as, "We finally answer the question: Whose baby are you, Batgirl?", and silliness like that. Unfortunately, in light of this morning's tragedy, it seemed in poor taste. Instead, I kind of threw together a look at what goes into my set bag when I'm acting on location. My thoughts and prayers are in Colorado today. Thank you, Erin.
________________________________________________________________________________
This morning, I had the extreme pleasure of hanging out on the set of Today's Homeowner with Danny Lipford. It's a nationally-syndicated home improvement show (think: Tool Time from Home Improvement) that's filmed in my town, and I was called in to help product test a popular "As Seen On TV" item. Of course, if you want to know what it is, or if it worked, you'll have to tune in to the 15th season premier! (And I will totally tell you when that is, when I find out. Probably should have asked...oops...)
For this, I was doing my own hair, makeup, and wardrobe, so I needed to make sure I had a few essentials on-hand, in case any adjustments needed to be made, and for touch-ups, in general. I didn't take much, so this shouldn't be a super-long post; the long post will come when I show you the same set bag, only when I'm in the producer's role. Hoo, boy!
 |
| Might I offer a cute puppy? |
This morning, I had the extreme pleasure of hanging out on the set of Today's Homeowner with Danny Lipford. It's a nationally-syndicated home improvement show (think: Tool Time from Home Improvement) that's filmed in my town, and I was called in to help product test a popular "As Seen On TV" item. Of course, if you want to know what it is, or if it worked, you'll have to tune in to the 15th season premier! (And I will totally tell you when that is, when I find out. Probably should have asked...oops...)
For this, I was doing my own hair, makeup, and wardrobe, so I needed to make sure I had a few essentials on-hand, in case any adjustments needed to be made, and for touch-ups, in general. I didn't take much, so this shouldn't be a super-long post; the long post will come when I show you the same set bag, only when I'm in the producer's role. Hoo, boy!
 |
| This is the set bag. It's from Open Sky, and I can't recommend it enough. It goes for $28, but I had a coupon for $20 off a purchase of $40 or more, plus free shipping, so I added a $12 makeup bag to the order, and got both for $20. You can't beat that with a stick. Seriously, if you haven't checked out Open Sky, you need to. You can see there's an outside pocket where the "ful" logo is, and there's a side pocket, too, just large enough for a water bottle or sunglasses. |
 |
| Here's a shot of the inside. The center section is a zippered pouch. The top compartment is very roomy, and the bottom compartment (also roomy) has another zippered pouch and several small sleeves for pens, cards, and whatnot. Construction of the tote is extremely sturdy, and the handles are comfortable on your shoulder. |
 |
| So, what's inside? In the bottom compartment, I have some extra hold hairspray (Aussie Freeze + Shine), a Marilyn teasing comb, a hairbrush, and a ponytail holder and bobby pins (not pictured). In the center pouch, I have a makeup bag (the $12 one. Why not?). The top compartment holds a bag for miscellaneous stuff. Really, that's just there for when I'm managing other actors' personal effects. I can hold onto my own keys and phone in my own bag without putting it inside another bag first. Probably. |
 |
| The makeup bag is a Jane Marvel, and is coated in plastic inside and out, so it's durable and super easy to clean. I thought the silver sequins would A) make it stand out in a sea of makeup bags when I'm backstage or behind the scenes, and B) allow it to double as a clutch if we're on vacation and go somewhere nice. No sense packing an extra "in case of emergency" purse if you can avoid it. |
 |
| So, what's in the makeup bag? Not much, actually: dental floss, a travel brush/mirror, Burt's Bees lip balm, travel brush pack, Revlon Lip Butter in Peach Parfait, Luna Twilight palette in Rosalie, and a Rimmel pressed powder. Oh, and a lipbrush. I missed that. Basically, it's just the essentials. This is the look I came up with for the shoot today. Because it's a home improvement show, I needed to keep things natural and minimal. (I also needed to find someone else to take this picture for me. I know I say it every time, but boy, do I suck at self-photography.) However, because it's a television program with lights and cameras (and action! I'm sorry...), I had to make sure it would show up. Here's the result: |
 |
| I won't bore you with every product used. The main components were a good, full-coverage foundation (MAC Studio Sculpt), setting powder (Rimmel Stay Matte transluscent), an HD finishing powder (E.L.F. HD Powder). Then, I just had to make sure that I had enough color to keep from being washed out, and that all features were defined. A little contouring and highlighting keeps the face from appearing flat on camera, too. And, yes, I curled my hair. Couldn't go on tv with it all scraggly, now, could I? If you'd like the full details on my on-camera look, let me know in the comments. Thanks! |
Thursday, July 19, 2012
Frugal Friday, Thursday Edition: Wet N Wild Idol Eyes Creme Shadow Pencil
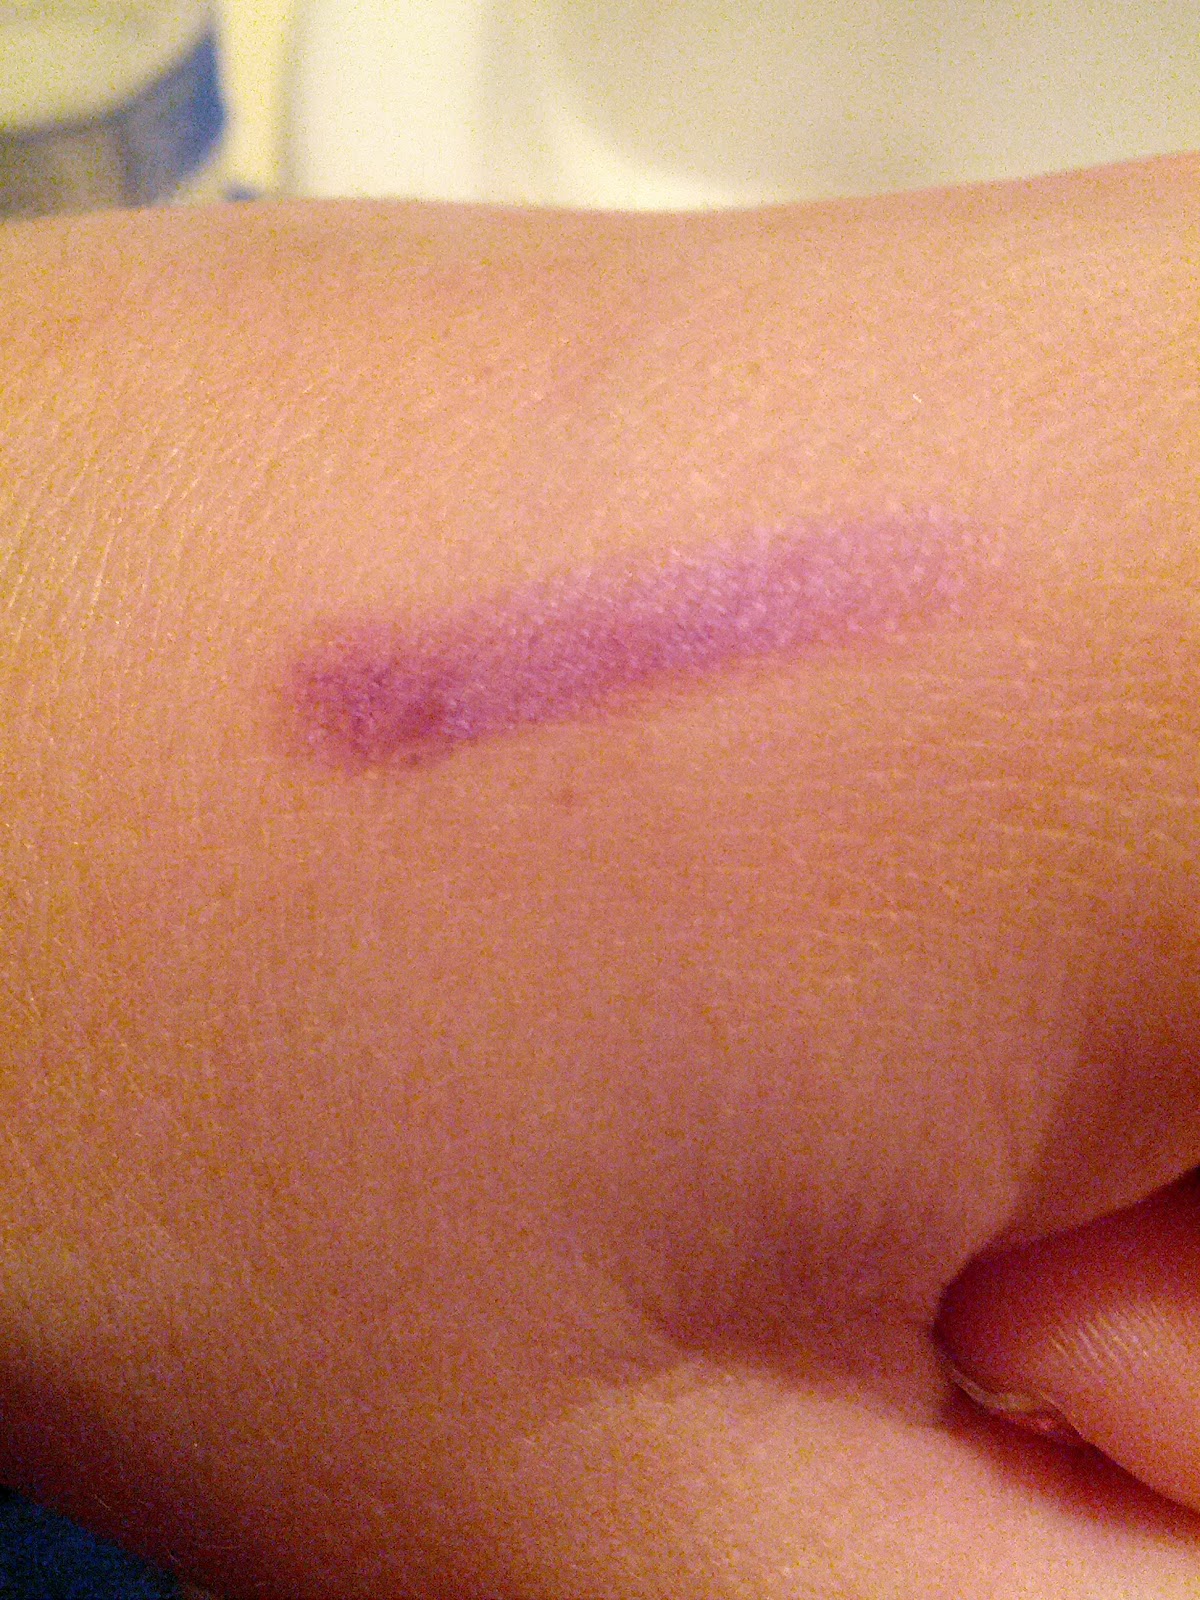
One of my favorite go-to products is the Urban Decay 24/7 Shadow Pencil. You can apply straight from the pencil, smudge it out with your finger, and head out the door. It pops easily into a purse or travel bag, and the color lasts forever with zero creasing--no primer needed. It's a must-have, god-send, holy grail product. So, imagine my delight when I saw that Wet N Wild had their own version, with a beautiful $1.99 price tag. Drugstore dupes for the UD pencils are popping up everywhere, but this is the least expensive version I've seen, yet. I snapped up one in Techno, a gorgeous opalescent purple, and gave it a go this morning. Here's how that went down:
First, here's a quick look at the pencil, itself, with a Revlon lip butter for size reference. I didn't photograph the pencil against the UD for size comparison, simply because my UD are deluxe travel size and not standard length. It wouldn't have been a true assessment. For the curious, the WNW is about the same size as the UD deluxe travel.

Now, here's a swatch. The shade is really, really pretty. The pigmentation could be a little better, but it's certainly not bad, and the lilac color payoff is just lovely. With the opalescence, it practically glows. Gorgeous.
I wish I could leave it at that, but I can't. There's, unfortunately, a downside. The product is downright oily. It feels greasy on your skin, and slides around badly. That swatch on my hand wiped right off with a tissue. I tried to set the pencil with a matching powder shadow from the Too Faced Glamour To Go Dream Edition (it's a perfect match), and had problems with my brush wiping off the pencil!!! Seriously!!! Even with the shadow, it creased like crazy, and has required multiple touch-ups. I'd take a picture, but I'm pretty sure I'm down to only shadow now. It just didn't work.
Can it work? I think so. I think it could work over a very dry primer, like UD Primer Potion, and set with a colorless powder, like Ben Nye's Neutral Set.
Final Verdict: 4 out of 10. The color and price are amazing, but it's going to take a lot of work to wear it well.
 |
| This is super saftey-sealed! I ended up having to go all "HULK SMASH!" on it to get into the product. Pro tip: have scissors handy. |
 |
| Here it is before I set it with shadow. Pay no attention to the lack of any other makeup on my face...ugh... |
Can it work? I think so. I think it could work over a very dry primer, like UD Primer Potion, and set with a colorless powder, like Ben Nye's Neutral Set.
Final Verdict: 4 out of 10. The color and price are amazing, but it's going to take a lot of work to wear it well.
Tuesday, July 17, 2012
Dangerous Beauty: Disney Villains Designer Collection
A couple of years ago, MAC and Disney teamed up to create a line of villain-inspired cosmetics. The products themselves were very high-quality, and I happily snapped up a gorgeous Doctor Facilier lipgloss, but the effort was not without its flaws. Some of the products (including my lipgloss) were retreads, and the artwork was, frankly, a little disappointing--especially given the fact that both Disney and MAC are known for their artistry! Well, folks, Disney is trying it again this August, albeit, without the help of MAC.
This time around, we have the Disney Villains Designer Collection, consisting of a set of three lipglosses, a six-shade eyeshadow palette, a silver compact mirror, a six-piece nail polish set, a tote bag, journals, and a doll for each of the six featured characters.
I have not been able to test out any of the products, so I can't vouch for quality. All I can give you are my first impressions, based on photos of the products and packaging. Now, as you all know, I am a Disney fangirl of the highest order, and I adore a good villain. After all, what good is a hero if they have nothing to fight? So, it might come as a shock to you that I'm not thrilled with what I've seen.
For starters, the packaging looks shoddy. I know that packaging is superficial, and it's the product that really matters, but when the producer is freaking Disney, you expect a little more attention to detail. Plus, if the company--any company--doesn't care enough about the presentation, you have to wonder how much care went into the product. In the publicity photos I saw, there were tears and dents in the outer packaging. The lipgloss tubes are somewhat clumsy-looking, as well, and I'm not sure how long the designs will before chipping off.
My next concern is the quality of the product. Again, I've not tested any of these, but when I look at a photo of a nail polish and see that it is already starting to separate, it worries me. The prices aren't terribly expensive, but they're still high enough to cause me to expect more. Plus, the Disney name, in my opinion, requires better.
Lastly, I'm not digging all of the color choices. The nail polish shades are fine, and the lip glosses are decent, I guess (classic red, nude, and a weird purple color...okay...), but the eyeshadow palette is abysmal. If you're looking for single shadows, then this would probably work for you. If you're like me, though, and expect your palettes to yield a few complete looks, then you can probably skip this one. Brown, plum, green, orange, beige, and white don't really work all that well together, in my opinion.
Okay, now that all that nastiness is over, there are some really good things about this collection. The artwork is stunning. Just look at this gorgeous, stylized Ursula:
This is what the MAC collection was missing. These sketches are artful, sexy, and make me want to smoke out my eyes and darken my lips. If you want to sell makeup, this is a darn good way to do it. I may have to add this compact to my makeup bag. As for the other stuff...try it out before making any decisions. I'm afraid that, like these villains, something rotten may be lurking beneath a beautiful exterior.
This time around, we have the Disney Villains Designer Collection, consisting of a set of three lipglosses, a six-shade eyeshadow palette, a silver compact mirror, a six-piece nail polish set, a tote bag, journals, and a doll for each of the six featured characters.
I have not been able to test out any of the products, so I can't vouch for quality. All I can give you are my first impressions, based on photos of the products and packaging. Now, as you all know, I am a Disney fangirl of the highest order, and I adore a good villain. After all, what good is a hero if they have nothing to fight? So, it might come as a shock to you that I'm not thrilled with what I've seen.
For starters, the packaging looks shoddy. I know that packaging is superficial, and it's the product that really matters, but when the producer is freaking Disney, you expect a little more attention to detail. Plus, if the company--any company--doesn't care enough about the presentation, you have to wonder how much care went into the product. In the publicity photos I saw, there were tears and dents in the outer packaging. The lipgloss tubes are somewhat clumsy-looking, as well, and I'm not sure how long the designs will before chipping off.
 |
| Photo Credit: Chic Profile |
My next concern is the quality of the product. Again, I've not tested any of these, but when I look at a photo of a nail polish and see that it is already starting to separate, it worries me. The prices aren't terribly expensive, but they're still high enough to cause me to expect more. Plus, the Disney name, in my opinion, requires better.
 |
| Photo Credit: Chic Profile |
 |
| Photo Credit: Chic Profile |
 |
| Photo Credit: Bella Sugar |
 |
| Photo Credit: Chic Profile |
Monday, July 16, 2012
Rockabilly Glitter!: Sally Hansen Salon Effects Nail Polish Strips
This weekend, Fighting Owl filmed some stuff (details to follow, as soon as I know what's going on, myself), but I got to don the old Claire Renfield duds for the occasion! I've played a lot of characters in my day, but I have to say that she's one of very few that's earned a special place in my heart. Plus, her costumes are always ridiculously cute, and this one may have been the best, yet.
Anyway, since Claire is a little (okay, a lot) on the rockabilly side, I normally paint her nails bright red. This time, though, Thomas saw these, and nothing would do but I had to wear them.
![]()
Aren't they fabulous!?!
Anyway, since Claire is a little (okay, a lot) on the rockabilly side, I normally paint her nails bright red. This time, though, Thomas saw these, and nothing would do but I had to wear them.

So, here's the deal with these little suckers: supposedly, because they go on dry, they're time-savers and fantastic for gals in a hurry. I call shenanigans. If you want to do these right, they take as long to apply, if not longer, as regular nail polish. You also really need to add a topcoat to secure the seal, which completely voids their whole "no drying time" claim. However, if you're into really intricate nail art, these might be right up your alley.
 |
| These are called Headbanger, and have, sadly, been discontinued, hence the clearance price. Would I pay $8.54 for these? Heck, no! You get one application! These are really only worth it if you can get them under five bucks. |
 |
| I do like that they come with all of the tools you need. To apply, remove all existing polish. Then, push down cuticles with the included orange stick. Shape nails with hot pink side of file, then buff with the white side (not shown). Wipe nails down with polish remover, once more, to ensure the cleanest nails possible. |
 |
| Choose the strip that best fits each nail, starting with pinky and working to thumb. Remove the plastic cover sheet and white backing, and break off silver tab. Apply to nail, holding strip in the middle for best control. Stretch stip to fit nail, then fold excess over the nail tip. Create a crease with the orange side of the nail file, and break off excess. Use the blunt side of the orange stick to seal all edges.
PROS: Really cute designs, relatively easy application, decent wear.
CONS: Pricey, chips easily during application and shortly after, requires a topcoat to seal, not a time-saver.
Final Verdict: 7 out of 10. I recommend these if you are into nail art and can catch them on sale.
Curious about that rockabilly look? This was taken after filming, and after I'd taken off my costume and put on my street clothes, so please pardon if I'm a little disheveled.
 |
Why, yes! That is a skull in my hair flower! If you like this look and want to know what products went into it, let me know in the comments.
Friday, July 13, 2012
Frugal Friday: Checking Out Wet N Wild's Megas!
If you've been around here for any length of time, then you'll know how much I love Revlon lip butters. They're beautiful, moisturizing, last a decent length of time, and the packaging is precious. Still, I do love a good bargain, and I'd heard that Wet N Wild had their own version. I didn't know the name of the product, though, so I picked up two items that looked similar to the lip butters (I've since seen a third, a lip lacquer, but have not had the opportunity to try it) to see if there was any comparison. Let's take a look, shall we?
I think you can tell by looking at these swatches that neither one is a lip butter, so I need to keep looking. Still, since we're here, and since these are only $1.99 each, let's take a look at these.
Mega Last Lip Color in Just Peachy
I really hate this product. There it is. I said it, and I'm incredibly sorry. It's going in the trash can. The swatch isn't bad, but on your lips...okay, let me describe it this way: when I was about 12, my Mom and Dad let me start wearing lipstick. That was it; just lipstick. Immediately, I became enthralled by the Wet N Wild display at Phar-Mor. I'd say at least 75% of my allowance went to different shades of lipstick, each pinker and tackier than the last (I was 12!), and my favorite was called Petal Pink. It was this godawful Barbie-pink, chalky, super-dry abomination that make my lips look like I'd coated them down in Pepto-Bismol, and I thought it was fabulous.
This looks exactly the same, only slightly more orange. In 20 years, only the packaging and my taste have improved.
Mega Shield Lip Color SPF 15 in Pink Champagne
In direct contrast, I'm really enjoying this lip color! It's closer to a CoverGirl Gloss Balm than a lip butter, but that's just fine with me. In addition to being a lovely shade, the product is very moisturizing, has no discernible flavor or scent, and contains the all-important SPF. It's not very long lasting, though. That's really the only drawback I've seen. This is also a much more pigmented product than I originally thought it would be. There's nothing sheer about this pink!
I thought the packaging for both products was very pretty, though both caps are difficult to remove, and I finally gave up on ever getting all of the plastic off of the Pink Champagne.
Final Verdict: Skip the Mega Last, but pick up every color you can of the Mega Shield. They're beautiful, feel good, give protection, and are less than two bucks a pop.
 |
| Left to Right: Mega Last Lip Color in Just Peachy, Mega Shield Lip Color SPF 15 in Pink Champagne |
 |
| Top to Bottom: Mega Last Lip Color in Just Peachy, Mega Shield Lip Color SPF 15 in Pink Champagne |
Mega Last Lip Color in Just Peachy
I really hate this product. There it is. I said it, and I'm incredibly sorry. It's going in the trash can. The swatch isn't bad, but on your lips...okay, let me describe it this way: when I was about 12, my Mom and Dad let me start wearing lipstick. That was it; just lipstick. Immediately, I became enthralled by the Wet N Wild display at Phar-Mor. I'd say at least 75% of my allowance went to different shades of lipstick, each pinker and tackier than the last (I was 12!), and my favorite was called Petal Pink. It was this godawful Barbie-pink, chalky, super-dry abomination that make my lips look like I'd coated them down in Pepto-Bismol, and I thought it was fabulous.
This looks exactly the same, only slightly more orange. In 20 years, only the packaging and my taste have improved.
Mega Shield Lip Color SPF 15 in Pink Champagne
In direct contrast, I'm really enjoying this lip color! It's closer to a CoverGirl Gloss Balm than a lip butter, but that's just fine with me. In addition to being a lovely shade, the product is very moisturizing, has no discernible flavor or scent, and contains the all-important SPF. It's not very long lasting, though. That's really the only drawback I've seen. This is also a much more pigmented product than I originally thought it would be. There's nothing sheer about this pink!
I thought the packaging for both products was very pretty, though both caps are difficult to remove, and I finally gave up on ever getting all of the plastic off of the Pink Champagne.
Final Verdict: Skip the Mega Last, but pick up every color you can of the Mega Shield. They're beautiful, feel good, give protection, and are less than two bucks a pop.
 |
| Wearing Pink Champagne. |
Thursday, July 12, 2012
I Left My Heart In San Diego
I am not at Comic-Con right now, and I'm not particularly happy about it. Nope. Not happy.at.all. Luckily, I can keep up with the shenanigans and goings-on by checking out my friend Aaron's posts over at Paranormal Pop Culture, and I encourage you to do the same. It's a fun read, and a great way to stay in the loop.
If you're at the big show, have a wonderful (and safe, please!) time! If you're not...well, you're not alone.
We're filming this weekend, actually, so even if I could be at the con, I really couldn't (if that makes any sense). On the plus side, I'll still get to see my fair share of undead creatures, aliens, and mini-skirts. Heck, I'll even get to wear a costume...that includes a mini-skirt, come to think of it. And while I don't have a "con bag" this year, I will have a "set bag", and oh, what a set bag it is!! I am so excited over this stupid tote bag, it's ridiculous. I'll do a full review on it and take pictures once I get it all stocked and ready to roll, but here's a teaser (how very Comic-Con):
 |
| Photo Credit: Open Sky |
Wednesday, July 11, 2012
Audience Participation Time!
Question: How many of you subscribe to Glossybox? Any of you trying to figure out what to do with the boxes once you've unpacked the goodies? Bueller? Bueller?
The actual Glossyboxes are baby pink, high-quality, heavy-duty cardboard gift boxes with lids. Think of a photo box, and you've got the basic idea. These are not cheap boxes; in fact, a similar design at The Container Store will run you $9.99. In other words: I don't want to throw them out. That's like throwing away money, and that is just something I can not abide.
The actual Glossyboxes are baby pink, high-quality, heavy-duty cardboard gift boxes with lids. Think of a photo box, and you've got the basic idea. These are not cheap boxes; in fact, a similar design at The Container Store will run you $9.99. In other words: I don't want to throw them out. That's like throwing away money, and that is just something I can not abide.
My current plan is to use the boxes as organizers. I've taken all my nail polishes out of the dump bag they were in, and replaced them--standing up--in one of the boxes, then set that box in a drawer. My other box is housing all of my small travel palettes and a few loose items that were floating around in another drawer.
 |
| Nail polish is almost sort of organized. Apparently, that red has given up on me...traitor. |
 |
| All of my small travel palettes, plus some loose items and tools. |
 |
| And here's that same box in it's new drawer home. Hmmm...maybe I could use another one for larger palettes... |
My July box will probably end up...holding loose craft items, maybe? I need a sewing box, so that might work, for now? After that, I could store them to use as Christmas gift boxes, but then what? I don't have any photos to store, so...decoupage? Anyone up for an art project?
Seriously, I don't want to toss them out, so do you guys have any suggestions? Leave them in the comments, please, and maybe we can discuss them when the July box rolls around. Thanks!
Subscribe to:
Comments (Atom)