Recently, I've had the extreme pleasure of working in an Andrews Sisters tribute trio with two lovely and talented ladies. We're still in the rehearsal stage, and only just ordered costumes yesterday, but I thought it would be fun to do a post on historically accurate makeup from the WWII era. Even if you're not Boogie Woogie Bugle Boy-ing, this might come in handy for Disney Dapper Day, Halloween, theatre, or if you just feel particularly glam one day and want to rock your inner Rosie the Riveter. At the end, I'll give recommendations for modern day product options. Now, come along with me on a Sentimental Journey. Who knows, maybe Grandma was cooler than you thought.
Let's start with the basics (and a good giggle): Face shapes. In the 1940s, the oval face shape was most desired. Great care was taken with hair, lipstick, and clothing choices to create the illusion of an oval shape if the natural bone structure could be considered round, square, or anything else other than oval. Here is a fantastic (and hilarious) vintage film tutorial on creating an oval shape. I'd embed, but it's been disabled. I'll just wait here while you go watch.
Go on.
Did you watch it?
Seriously, that made my day.
Next comes the actual makeup. Here is a simplified tutorial, hosted, again, by our friend in the red dress. The gist is that makeup was to be minimal, and only used to emphasize natural beauty. The entire routine shown in the film consists of moisturizer or light foundation, rouge that is blended out to near invisibility, lipstick (in a coordinating shade to rouge and nail polish), and powder. And that's it. No eyeshadow. No liner. No mascara. No freaking nothing. I can embed this one, so here you go:
The lipstick application process was surprisingly specific. They didn't mess around back then.
Now, these videos have been, well, adorable, but if you'd like to watch something a little more in-depth, here's a fantastic modern tutorial that retains the integrity of the era:
Glamour Daze is a fantastic site for figuring out a vintage look for everything from a Downton Abbey viewing party to a Woodstock reenactment, and Return2Style has a great guide with color samples. According to these sites, foundation should be slightly darker than your actual skintone, with powder just a bit lighter. The powder should also have a rosier cast to it if your natural skintone is on the yellow side, and, universally, blush should stay on the pink side, as well. Eye makeup is kept minimal, with only a light contour of gray, taupe, or brown to define the socket. Liner should be thin, if not altogether non-existent. The winged-out cat eye didn't gain popularity until the 1950s, so skip that. No eye makeup should be used on the lower lashline, but loads of clump-free black mascara should coat the top lashes. You can go the false lash route, but keep 'em natural.
Besides the lashes, the emphasized parts of the face are the brows and lips. Brows should be neat, but not overly plucked, and the definitively arched shape defined by pencil or powder in a shade that matches their color. A little vaseline or clear gel will hold the brows in place, as well as add glossiness. Lips should be well-defined, and the shape should yield the most attractive, full look possible. This might mean drawing slightly outside of the lines if your lips are thin. The upper lip was commonly exaggerated at that time. When choosing a lip color, any shade of red or pink, and even red-based orange would be appropriate, depending on how natural or bold you want to go. A dot of clear gloss or vaseline in the center of the lower lip will help achieve the shiny "Hollywood" look that was popular at the time, but is not necessary.
Okay, folks, here's where things get interesting: Nail Polish! For years, I've thought 40s polish had to be red or pink. Boy, oh boy, did I have that wrong! The popular style was a half-moon mani, with just a sliver of unpainted nail at the top, and the color matched your outfit and accessories. That's right. It matched the outfit. Revlon did release a line of coordinating lippies and polishes around that time, and that look became popular, too, but--believe it or not--there was some serious color experimentation going on with greens, blues, yellows, and even black.
(Think about that for a sec: Gra'ma could've rocked some b*tchin' goth nails.)
So, that's a lot of info on 40s makeup, but what should you use to recreate that style nowadays? Well, let's see what we can come up with:
Foundation
40s makeup calls for a flawless base, so you'll want something medium to full-coverage with a matte finish. I like CoverGirl Outlast 3-in-1 as a drugstore option. High end (well, higher end), MAC has something for darn near every skin type and shade, and an artist can help you color match.
Powder
Rimmel Stay Matte powder is a clear winner, with CoverGirl Oil-Control Pressed Powder meriting an honorable mention. I'm also a fan of E.L.F. HD Powder, but as a finishing powder over something else that actually sets the makeup. High End, I like Laura Geller Balance and Brighten Baked Color-Correcting Foundation (it's a powder foundation, but sets makeup beautifully when applied with a fluffy brush).
Blush
NYX does a great powder blush, and Dusty Rose, Rose Garden, or Bourgeois Pig (love that name) would all work quite well. E.L.F. Studio Blush in Pink Passion looks downright frightening in the pan (matte hot pink?! The heck?!), but gives a very natural pink flush to the cheeks. It's in my film kit now, actually. High end, I'm digging the new Julep blushes, so I'd recommend Petal Pink. (If you have the NARS One Night Stand palette, go for the hot pink one. I'm just not putting it here because it was limited edition.)
Eyeshadow
I only have one rec for this one, and that's the Urban Decay Naked Basics palette. Either W.O.S. or Foxy all over, with Naked 2 in the crease. Done. You can also use Naked 2 or Faint in the brows, and the $27 price point for six shadows keeps this in the "affordable" realm. That's $4.50 per shadow, which is squarely in the middle of the price range for drugstore single shadows.
Liner
I'm going rogue and recommending Urban Decay 24/7 pencil in Perversion. It's so dark that it looks like liquid, but you get the control of a pencil. MAC Fluidline in Blacktrack is another good option. Drugstore, you can't beat Essence gel liner. It's fantastic, and super cheap.
Mascara
Drugstore, Maybelline The Rocket. High end, Buxom Buxom Lash. Waterproof, in both cases. Benefit They're Real would be here if you could remove the stuff without ripping out your lashes. That stuff does look gorgeous on, so if you're feeling adventurous, go for it.
Lipstick
NYX Soft Matte Lip Creams are beautiful, inexpensive, smell delicious, feel good on, and last forever. Pick a color, any color. Revlon Kissable Balm Stains are another viable option. High end, MAC Russian Red. It's classic and doesn't budge. It does dry, though, so keep that in mind.
Nail Polish
Apparently, the sky's the limit. Pick a cream finish in a vampy navy or army green for a fun twist on a classic half-moon manicure. I'm considering Julep Kendra or Sally Hansen Complete Salon Manicure in Thinking of Blue.
Have fun getting all dolled up!
Showing posts with label youtube. Show all posts
Showing posts with label youtube. Show all posts
Wednesday, April 9, 2014
Friday, August 24, 2012
Frugal Friday: Rediscovery
One way I've been able to save a little bit of money, lately, has been by trying to see some of the makeup I already own in a different light. For example: I have a Vincent Longo Hydro-something-or-other that I almost never use. I tried it as a blush; I tried it as a highlighter; I even tried it as lipgloss and eyeshadow. Nada. Into the abyss--I mean, drawer--it went, probably never to be heard from again...until I saw this video on YouTube:
My Hydro-whozee-whatsit is very similar to the stick product used in the video! Also, that eye shadow looks an awful lot like that weird Snakebite color in my Naked 2 palette! And I'd never thought of lining my eyes with that technique! Now, I'm no Victoria's Secret model, so I didn't follow the tutorial to the letter, but I did use it as inspiration and, using only products that were on-hand, came up with this:
I really like this! Plus, I now have a use for a couple of products that were previously collecting dust.
Looking for inspiration, yourself? Here are some of my favorite tutorials that I've stumbled upon recently. I hope you enjoy them as much as I have! The ladies in these videos are incredibly talented, and a lot of fun to watch. Please click on the "More Info" button at the top of each video for information on how you can subscribe to their channels. Thanks!
My Hydro-whozee-whatsit is very similar to the stick product used in the video! Also, that eye shadow looks an awful lot like that weird Snakebite color in my Naked 2 palette! And I'd never thought of lining my eyes with that technique! Now, I'm no Victoria's Secret model, so I didn't follow the tutorial to the letter, but I did use it as inspiration and, using only products that were on-hand, came up with this:
 |
| Again, pardon the car. It's the best lit area I have. Seriously. Also, someone please tell me that the model in the above video started out with bronzer in the hollows of her cheeks, and make me feel better. Pretty please? |
I really like this! Plus, I now have a use for a couple of products that were previously collecting dust.
Looking for inspiration, yourself? Here are some of my favorite tutorials that I've stumbled upon recently. I hope you enjoy them as much as I have! The ladies in these videos are incredibly talented, and a lot of fun to watch. Please click on the "More Info" button at the top of each video for information on how you can subscribe to their channels. Thanks!
Tuesday, May 22, 2012
Challenge!: $20 Makeup Look
The other day, one of my favorite vloggers, DivaMakeupQueen, posted a video on the $20 Makeup Challenge Tag. At the end, she tagged everyone who viewed the video. Now, I'm not a vlogger, and even if I were, I doubt she'd ever know if I'd welched on the dare, but I'm too honest for my own good. So, without further ado, I give you:
The $20 Makeup Challenge!!!
(BTDubs, this is a heckuvalot harder than it sounds.)
The Rules: Pretend you have a $20 bill. Using only products and tools that you could purchase with that bill, put together a full face of makeup from start to finish. I will warn you, the end result is not the best. I mean, I could have lived with it for the day, if I'd needed to, but it's not my best look.
Okay, first, let's just get this picture over with...
 |
| GAH!!!! SHE'S A WITCH! BURN HER!! This is after getting soaked in a flash storm, so please bear with me. |
So...yeah...it looked a lot better in person. Let's start with products used and the grand total:
E.L.F. Mineral Foundation in Warm applied with included Mini Kubuki Brush: $5
E.L.F. Essentials Eyeshadow Primer as primer and concealer (better than nothing): $1
Profusion Spotlight Eyeshadow and Lipgloss Palette, applied with included applicator: $4
E.L.F. Studio Blush in Pink Passion, applied with Mini Kubuki Brush: $3
Victoria's Secret Beauty Rush Mascara: $6
Total: $19
If I'd had a $1 black eyeliner, that would have helped tremendously. Unfortunately, that wasn't the case.
Now, let's talk about what went right with this look. Right off the bat, I'd say the color was great. You can see from the photo just how pretty and bright that blush is, and how soft, shiny, and pigmented that lipgloss is (which was applied with my finger, by the way). The shadows went on smoothly and blended well, even with a dinky little sponge-tipped applicator, and the foundation covered well and looks nice and glowy. Plus, believe it or not, the mini kubuki brush didn't suck. It's not my first choice, but it didn't create any problems. I truly believe that having a good, inexpensive palette that took care of more than one area of the face helped salvage this challenge.
Alrighty, now for the wrong. If nothing else, I needed a moisturizer in the worst way. Going one better, I really needed a primer. I was born with expression lines in my forehead, and you'd be hard pressed to catch me on a day when I didn't have on some form of a primer (today, it's part of my beauty balm). I also hate the lack of eyeliner. I tried using an eyeshadow, but without a decent brush to apply it, it really didn't work.
Other thoughts: A real concealer would have been helpful in brightening up the undereye area. My brows are actually in decent shape, so I'm okay with leaving them as is.
Wheel Of Morality, turn, turn, turn! Tell us the lesson that we should learn!: High quality color doesn't have to come with a high price tag, and there's no substitute for a good moisturizer and primer. If you're going to invest in something, invest in those.
So, who do I tag? ALL OF YOU!!! Leave your responses in the comments!
Wednesday, May 16, 2012
Unsolicited Advice: Enroll in YouTube Beauty School!
I am not a makeup artist, and I don't even play one on tv. I am simply a makeup enthusiast who also happens to be a performer, and because of that, I sometimes have to come up with looks for stage or screen. Now, to me, stage is easy. I sponge on my Ben Nye stage foundation, then pretty much just pile color on top of that until I'm confused for a hooker. If no one's asked how much you charge, yet, keep going till they do. Sure, there's a little more nuance to it than that, but that's the basic idea.
Screen keeps me totally bumfuzzled. You have to keep the makeup looking natural, but also have enough on to show up on camera and also avoid being washed out by lights. There's a very fine line. I'm getting better at walking it, though, thanks to a workshop given by a lovely makeup artist friend...and good ol' YouTube.
I kid you not, YouTube has been an absolute Godsend, but you have to be careful which "gurus" you go to. Not everyone who hosts a beauty channel actually knows what they're doing (I know! People posting useless videos on the Internet?! Color me shocked!), so I'll add a list at the end of some that I've grown to love. When you find talented people who communicate well, you can take inspiration from their videos, and also educate yourself on products and techniques. After all, what good is expensive makeup or fancy brushes if you don't know how to use them?
Anyhoo, back to screen makeup! This weekend, Fighting Owl Films is shooting a short, and I'm playing one of the lead characters: a stuck-up, snobby, gold digger (yes, my husband wrote it for me. Why do you ask?). The film's a silent, so the visuals are super-important--even more so than usual. To up the degree of difficulty, this will also be our first film shot in HD.
DivaMakeupQueen
emilynoel83
FleurDeForce
GlowMyWay
gossmakeupartist
pixiwoo
Screen keeps me totally bumfuzzled. You have to keep the makeup looking natural, but also have enough on to show up on camera and also avoid being washed out by lights. There's a very fine line. I'm getting better at walking it, though, thanks to a workshop given by a lovely makeup artist friend...and good ol' YouTube.
I kid you not, YouTube has been an absolute Godsend, but you have to be careful which "gurus" you go to. Not everyone who hosts a beauty channel actually knows what they're doing (I know! People posting useless videos on the Internet?! Color me shocked!), so I'll add a list at the end of some that I've grown to love. When you find talented people who communicate well, you can take inspiration from their videos, and also educate yourself on products and techniques. After all, what good is expensive makeup or fancy brushes if you don't know how to use them?
Anyhoo, back to screen makeup! This weekend, Fighting Owl Films is shooting a short, and I'm playing one of the lead characters: a stuck-up, snobby, gold digger (yes, my husband wrote it for me. Why do you ask?). The film's a silent, so the visuals are super-important--even more so than usual. To up the degree of difficulty, this will also be our first film shot in HD.
Last night, I conducted a practice run on makeup only (so forgive the hair and outfit), based upon and using a few techniques picked up from two YouTube tutorials. The final look is not a step-by-step result of either video. I don't even think I used a single recommended product. Rather, it's an amalgamation of ideas from these tutorials, mixed with tricks I've figured out on my own, and blended with character ideas from the director. I'm posting this simply to show how you can use Internet tutorials to your advantage, and I hope at least some of you have found this helpful.
 |
| Snobby enough? Oh, and check out the mini-duckface! Shot with my cruddy cell phone, in my bathroom with the worst lighting in the world. Enjoy! |
Products used:
- Tarte Clean Slate primer
- MAC Studio Sculpt in NW15, applied with Real Techniques buffing brush
- Benefit Boi-ing concealer in Light, applied with Real Techniques deluxe crease brush
- Rimmel Stay Matte pressed powder in Transparent, applied with Real Techniques buffing brush
- Urban Decay Primer Potion in Eden
- E.L.F. Brow Kit in Medium
- Urban Decay eyeshadows in Foxy, Bootycall, and Tease (Naked 2), applied with Real Techniques shadow brush
- Urban Decay eyeshadow in Blackout (Naked 2), applied as liner with Real Techniques accent brush
- Benefit Hoola bronzer, applied with Real Techniques contour brush
- Stila blush (Floral Palette, hot pink shade), applied with Real Techniques blush brush
- E.L.F. HD Powder, applied with Real Techniques powder brush
- Urban Decay False Lash mascara
- Ardell individual false lashes, Medium
- Duo lash glue
- NYX Soft Matte Lip Cream in Stockholm
- MAC Lip Pencil in Dervish
- Urban Decay Urbanglow Cream Highlight in Moonshine
DivaMakeupQueen
emilynoel83
FleurDeForce
GlowMyWay
gossmakeupartist
pixiwoo
Wednesday, April 18, 2012
Building Kits and Looking for Glitz
The indie film company that Thomas founded is filming in a few weeks. There's no crazy hair or makeup involved, and pretty much all of the actors and extras are taking care of their own. Still, I like to keep a kit on-set for touch-ups. Plus, there's always the possibility that someone will show up wearing either no makeup or way too much--I like to prepare for all contingencies. Now, I'm not a makeup artist (and if one would like to volunteer, that would be unbelievably cool and I'd love you forever and be your best friend), but I've been at this long enough to handle the basics to ensure folks show up on camera.
Of course, that doesn't mean I'm breaking out the high-end products. Good God, no! Along with figuring out that extra blush and bronzer are necessary to avoid being washed out by the lighting equipment, I've also learned that anything you bring on-set has the distinct possibility of being broken. You're in a crazed atmosphere, with people constantly bustling by, extension cords as far as the eye can see, and a lot of hurry, hurry, hurry. It's also not a big-budget studio setting, so I might be doing makeup off of a folding table, picnic bench, or, most likely, out of my car. I'm careful, and I keep a neat kit, but accidents happen. I know that if I brought my $25 NARS Orgasm (sorry, Mom) blush, and it was knocked off a table and broken into a million pieces, I'd be devastated. However, if the same thing happened to a $3 copycat...eh, I'd get a new one. Not a big deal.
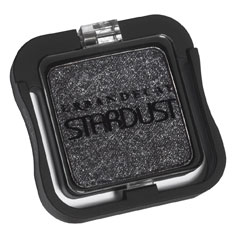
With that in mind, I hit the drugstore around the corner to pick up a few staples. I have greasepaint out the ears, but my "normal person" makeup was severely lacking. I needed translucent powder, a couple of blushes, and a matte black eyeshadow (every kit should have a matte white, matte brown, and matte black shadow. Period. I've heard this from a few different places, and it's completely true. You'd be shocked how much you can do with just those three products). Rimmel makes a great translucent powder, so that was pretty much a no-brainer. Wet 'n' Wild had a pretty rose blush, along with a peachy pink that looked so much like my NARS it wasn't even funny (I'll have more on those another day), and a matte black eyeshadow that vlogger DivaMakeupQueen raved about recently. But it was while picking up the eyeshadow that I noticed this beauty:
It's not terrible. Not even close. It's also not even close to Stardust, but it's still a darn good eyeshadow. Trashed goes past "highly pigmented" into "scarily pigmented". Yesterday, I added just a dab to my outer corners, but it blended all the way through my crease, along my lash line, and added a little color to my lid. It didn't sparkle, though, which was a little disappointing. Today, I decided to go whole-hog and do a black lid, just to see how much glitter I could get, and it wasn't much.
Wow. That looks like a ton of makeup, but it really only took a few minutes. I keep a small stash of seasonally appropriate makeup on my counter, so I don't really have to think too much in the mornings. I'm not good at thinking in the mornings...
Anyway, overall, I'm really happy with my purchase. Sure, I was looking for more glitter, but for two bucks, I really can't complain too much. This one's not going in the film makeup kit. It's going on my counter.
Final Verdict: 8 out of 10. It's beautiful, it's pigmented, it's cheap as all get-out. It's just not glittery, and a pain in the rear to try to open.
Of course, that doesn't mean I'm breaking out the high-end products. Good God, no! Along with figuring out that extra blush and bronzer are necessary to avoid being washed out by the lighting equipment, I've also learned that anything you bring on-set has the distinct possibility of being broken. You're in a crazed atmosphere, with people constantly bustling by, extension cords as far as the eye can see, and a lot of hurry, hurry, hurry. It's also not a big-budget studio setting, so I might be doing makeup off of a folding table, picnic bench, or, most likely, out of my car. I'm careful, and I keep a neat kit, but accidents happen. I know that if I brought my $25 NARS Orgasm (sorry, Mom) blush, and it was knocked off a table and broken into a million pieces, I'd be devastated. However, if the same thing happened to a $3 copycat...eh, I'd get a new one. Not a big deal.
With that in mind, I hit the drugstore around the corner to pick up a few staples. I have greasepaint out the ears, but my "normal person" makeup was severely lacking. I needed translucent powder, a couple of blushes, and a matte black eyeshadow (every kit should have a matte white, matte brown, and matte black shadow. Period. I've heard this from a few different places, and it's completely true. You'd be shocked how much you can do with just those three products). Rimmel makes a great translucent powder, so that was pretty much a no-brainer. Wet 'n' Wild had a pretty rose blush, along with a peachy pink that looked so much like my NARS it wasn't even funny (I'll have more on those another day), and a matte black eyeshadow that vlogger DivaMakeupQueen raved about recently. But it was while picking up the eyeshadow that I noticed this beauty:
 |
| Wet 'n' Wild Color Icon Single in Trashed |
This made me think so much of Urban Decay Stardust in Void that I had to give it a shot. For two bucks, even if it was terrible, I wouldn't really be out anything.
 |
| Photo Credit: Urban Decay |
I do want to point out that I did not use a shadow brush to apply this. I was terrified of how much fallout there might be from thickly packing on such a densely pigmented soft shadow. Instead, I used my blending brush to pick up enough for a thin layer, and applied two "coats" to each lid. There was almost no fallout from using that method, and I ended up with deep black lids with a lovely satin finish. There's just not very much glitter. Also, the packaging, while attractive, is insanely difficult to open. Like, "keep a butter knife handy" hard to open.
 |
| Lid: Trashed, Highlight: Stila Kitten, Liner: Urban Decay Zero, Inner Corner: Urban Decay Sin, Lashes: Tarte Lights, Camera, Lashes, Brows: E.L.F. Brow Kit (Med) and Treat and Tame (Deep), Skin: E.L.F. Mineral Foundation Warm/Benefit Porefection/Benefit Bo-ing |
Anyway, overall, I'm really happy with my purchase. Sure, I was looking for more glitter, but for two bucks, I really can't complain too much. This one's not going in the film makeup kit. It's going on my counter.
Final Verdict: 8 out of 10. It's beautiful, it's pigmented, it's cheap as all get-out. It's just not glittery, and a pain in the rear to try to open.
Wednesday, March 7, 2012
Chalk One Up For DIY Hair Color
This is brilliant.
My friend, Genna, sent this to me, and I am dying to try it out. Have you ever had something really cool to go to, like a concert or party, and wanted to try some funky colors in your hair? Well, you could try to track down some faux pieces, or (gawdluvya) ACTUALLY dye your own hair...or you could try chalking.
Photo Credit: kandeej.com
Yes, it's exactly what it sounds like. You use chalk to color your hair. Basically, you spray your hair with water, then rub non-oil-based chalk onto the strands. Set the color with a curling iron or flat iron. The color will wash out the next time you shampoo. Again, I haven't tried this, but if anyone has and wants to share pictures or experiences, let me know in the comments.
Also....
WHILE I WAS OUT
Okay, so I haven't really gone anywhere. Still...I'm never really all here...
My latest blog post is up at Paranormal Pop Culture. If you've ever been curious about the Jersey Devil or indie filmmaking, check it out. It's fun. :)
I've been a big fan of Neutrogena makeup remover wipes for some time now. However, I've recently switched to Olay Total Effects wipes. Look for a review sometime in the near future. Also, I'm still on the hunt for one more Real Techniques brush, then I can review the set. Unfortunately, we only have one Ulta in town, and I don't feel like paying shipping for one. flipping. brush.
Lastly, I received some promo codes from the Mints (JewelMint, ShoeMint, etc). If you are looking to join any of those groups--note: this is for first-time purchases only--leave me a message in the comments. I may be able to hook you up with a discount. Of course, this is while supplies last, only.
Thursday, December 29, 2011
Cinematic Romance (and All That Mushy Stuff)
Thomas and I are celebrating our fourth (really?) wedding anniversary today. Last night, while we watched a Rocky retrospective (we're nothing if not exciting), we both noticed that, without meaning to, Thomas proposed to me with almost the same wording as when Rocky told Adrian he was "wondering if [she] wouldn't mind marrying" him. And we both cracked up. That may very well be the greatest marriage proposal ever put on film, by the way. It's certainly my favorite, and not just because it mirrors my own.
Anyway, mine was a surprise proposal. Well, it was a surprise to me. I think everyone else on the planet knew, including my mother, who normally couldn't keep a secret THAT BIG from me if her life depended on it. We're too close, and way too darn much alike. Thomas took me out to dinner at a really nice, local Italian place. Of course, we were early for our reservation, so we needed to kill some time. We hung out in the nearby Dollar Tree for a few minutes, and I think bought some candy. We're classy like that.
When our reservation time rolled around, we headed into the restaurant, and were guided toward the back. I'm a chatterbox, and don't think I've stopped talking, except maybe to sleep, since 2007, so I was totally oblivious to the fact the hostess was leading us through the kitchen, out the back of the restaurant, across a courtyard, and into a cottage. Never once even floated past my consciousness that this was unusual. As we crossed the threshold into the cottage, Thomas put his hand on my arm, and simply said, "Wait." He walked slightly ahead of me as we left the foyer and entered the candlelit room, strewn with rose petals, and furnished only with a single table and two chairs, then got down on one knee.
I stopped talking.
That was a fantastic proposal. I can't imagine one better suited for the two of us, and I always tear up a bit thinking about it. If I had it to do over again, I wouldn't change a single moment.
I adore a good wedding proposal. I'm a total sucker for all things romantic, anyway, but this one appealed to the filmmaker's wife in me. I hope you enjoy it as much as I did. I grinned like an idiot through most of the video. The highlights for me were the girl's reactions and the slo-mo section set to "O Fortuna" from Carmina Burana. Have a great day, guys!
Friday, October 21, 2011
The 2nd Annual Obligatory Twilight Post
Coke or Pepsi? Around here, that question not only determines what
drink goes into your cup, but can actually factor into friendships,
jobs, and possibly who you'll eventually marry. I kid you not.
Liberal or Conservative? Again, a polarizing question that can have
major consequences if your views don't mesh with someone else's.
Boxers or Briefs? Not necessarily polarizing, but incredibly
personal, and quite frankly, a little bit rude. Seriously, if you have
to ask, you don't need to know.
When I write this blog, I try extremely hard not to write
anything that could possibly offend anyone. That's not to say that I
write pithy product reviews to keep companies happy--anyone who's read
this blog for any length of time knows that I hold no punches! What I
mean is that I try to avoid anything too controversial. This is a fun,
safe place to visit. We're here to discuss makeup, fashion, pop culture,
and all things cute and adorable (hence the name of the blog). There's
no need to delve into anything ultra-personal or divisive...
...except for Twilight.
Twilight is that rare bird that touches all of the subjects we discuss here. There's Twilight makeup, Twilight clothing, Twilight movies and books, Twilight action figures...the list goes on. It's everywhere,
and on top of that, it's Halloween, so it has to be addressed on the
blog. Unfortunately, people tend to either really, really love Twilight, or really, really hate Twilight. There is practically no middle ground. You either want to stake Edward or marry him, end of story.
With that, I will not divulge my feelings toward the franchise or
its characters. I am simply going to present to you with some stuff I found
that you may or may not wish to either peruse or destroy. It's up to you. Just keep it clean in the comments,
okay?
So, last year, we talked about glitter options and DuWop's Twilight Lip Venom. This year, we're focusing on supporting character, Alice.
First up, here's a really well-done, easy-to-follow makeup tutorial for an "Alice Cullen" look by Pixiewoo.
In it, you'll see some really good tips, like remembering your ears and
covering redness. The young lady in the video uses Make Up For Ever,
but you can use whatever brands you prefer. Even if you hate Twilight, watch this for the eye makeup. It's amazing, and really easy to do.
GAH!!! The Embed Code didn't work!!! You can view the tutorial here!
I am now addicted to the Pixiwoo channel. I hope you're all happy. My productivity is shot for the rest of th--oooh, look! A Corpse Bride tutorial!!
Yeah...this could be bad...
Anyhoo...next, I found a beautiful, Alice-inspired palette from the
DuWop Luna Twilight collection. It's a mini-palette (about the size of a
credit card), but it packs a big punch with two coordinating eye shadows
(silver and blue), two lip glosses (bright pink and hot pink), and a
pinky-beige blush. Other palettes are available for fans of Victoria,
Rosalie, and Bella (my personal favorite of the palettes), and all can
be found at a fantastic discount at Beauty Ticket. The regular price is $28, and Alice is priced at only $16. Plus, right now you can save an extra 15% with the coupon code Halloween15.
I hope at least a few of you found this helpful. If there's something else in the Twilight
world you'd like to see covered, please let me know in the comments. If
there's not...well, then please remember to play nice. Thanks!
Thursday, October 6, 2011
The Cutest Halloween Makeup Tutorial. Ever.
To me, the most fun part of Halloween has always been dressing up. When I was tiny, it meant putting on something princessy that my mom either made from scratch, or put together using that year's ballet costume and more determination than any human should ever have to. I'm sure that determination was helped along by the little tyrant standing next to her, demanding her to, "Sew good, Mama. Sew good." But I digress. Anyway, Halloween meant sparkly dresses and--the cherry on top, to a five year-old--digging through Mama's makeup. Afterall, you can't expect a princess to be seen without her blue eyeshadow and pink lipstick. I mean, come on.
When I was little, there was nothing more fun in the world than playing with Mama's makeup. Every now and then, she'd replace something or decide a shade didn't work for her, and it could go in my dress-up drawer. For as much joy as that brought me, you'd have thought she'd given me a million dollars. Of course, this was just for me to play with. I was never allowed to leave the house wearing makeup (not until I was much, much older, anyway), but I could play with it as much as I wanted.
I remember babysitting my two year-old cousin one day, just a few years ago, and her looking up at me, holding out her hand, and simply saying, "Fingernails pink." Next thing I knew, I was knelt down beside her, making her fingernails pink. I think silver glitter may have been involved, too, but I did draw the line at letting her make my fingernails pink. That sort of seemed like a disaster waiting to happen.
Little girls and dress-up go hand in hand. I mean, look at the success of places like the Bibbidi Bobbidi Boutique, or all those spa tea party places that keep popping up (or is that just a local thing? I swear, there's got to be one on every corner around here). As long as it's just good, old-fashioned, innocent fun, I think there's nothing more adorable. Now, it can get out of hand, but I'm in too good of a mood right now to spoil it by going off on a rant about skanky baby clothes, that French child model, Toddlers and Tiaras, or the way-too-goshdarned-early sexualization of girls today. I'd prefer to keep to the positive, and introduce you to Madison.
Madison is five years-old, and she loves makeup. Even more, she loves "complete looks", with hair styles, costumes, props, and anything else she can think of. She's also more than happy to show off how she creates her looks through remarkably articulate YouTube tutorials, which, at last count, have more than 11,000 subscribers (of which I am now one). Madison's not super picky about her brands, either, other than her sponsor-supplied brushes. She seems to prefer MAC, but utilizes everything from CoverGirl and E.L.F. on up. (Honestly, I get the feeling it's whatever Mom happened to have lying around.) When she really likes something, she'll even tell you to buy it or she'll be sad, but she says it with a grin.
This is a child who is having fun. Dear God, there aren't enough of those around these days. She's not expertly applying makeup to accentuate her features or play up her sex appeal; she's playing around with colors and putting on what she wants, simply because she wants to. She's not bad, either. Her technique's not great (little baby hands weren't built for brushes), but she understands swatching, colors, what brushes are used for, and can toss off well thought out opinions, reviews, and advice, such as, "I really love this eyeshadow for a highlighter." You don't see a lot of foundation, because Mommy won't let her wear it. I've been through several of her (at writing) 43 videos, and have yet to see mascara. This is just a sweet baby playing dress-up on camera, and it's heartwarming. Her exuberance is infectious. When she bursts into fits of giggles at the "pet spider" prop shimmying up and down his web, I chuckled along with her. You cannot watch this precious, precocious child and stay in a bad mood. I'm also highly impressed with her parents. They're fostering creativity, allowing her to enjoy her childhood as a child, and, if you compare early entries with her latest, her vocabulary and public speaking skills have improved exponentially.
Madison's latest tutorials are all Halloween-centric, with instructions for a sunflower, ladybug, kitty, clown, and (my favorite) a vampire princess. This is Halloween, folks. This is the joy of childhood innocence and imagination. Meet Madison. You'll be glad you did.
Monday, July 25, 2011
Driving, Tunes, and Why I'll Never Be On a Game Show
Okay, I officially suck. I did get the pictures from my Disney trip, and they're really cute. They're just not on this computer, and I have no way of getting to them until later this evening. *headdesk* Soooo...I'll just leave you with an embarrassing story to tide you over until I can anti-climatically post the now over-hyped photos. Enjoy.
Thomas and I drove to Orlando. It's about an eight hour drive down some of the least scenic, most boring stretches of highway you could ever hope to never have to encounter. To pass the time, Thomas brought along his iPod, and we listened to some of the podcasts he'd been able to stockpile. When those ran out, he switched over to albums, and started to play some of the Doctor Who soundtrack. Out of utter boredom, I started trying to play "Name That Episode" with the score.
Me: Oh! That's the pirate episode!!
Thomas: No, it's the Titanic. I don't have any Matt Smith stuff on here, yet.
Me: Got ya. Okay. (Next song) Oh! Oh! Daleks in Mahattan!
Thomas: Empty Child.
Me: Shoot! Well, similar styles, I guess. (Next song) Is that something to do with cybermen?
Thomas: Erin, that's TRON...
Me:...oh...thought it sounded familiar...
So, not only do I suck at photos and Doctor Who trivia, but I apparently can't even tell the difference between Who and TRON. Turns out, though, that I'm not the only person mashing the two together. For your listening and viewing pleasure, I give you abstractvmilk's well-edited DW/TRON mash-up video. I'm especially impressed with the lip-sync. If you're not into either Who or TRON, don't worry! I'll have different stuff to play with tomorrow. Who knows? Maybe there'll even be some un-asked for, overly sold vacation photos.
Wednesday, May 4, 2011
How About a Burrito Shaped Like a Light Saber?
May the Fifth be with you? Does that work? Depends on how you look at it, I guess. Anyway, I hope everyone drinks tons of margaritas (responsibly, and with a designated driver) and eats too much Mexican food today.
Turns out, yesterday (or today, since I write this stuff a day in advance, and sometimes things get all timey-wimey on me) was Star Wars Day. Each year, on May 4th, geeks like me are supposed to exclaim, "May the Fourth be with you!" to each other. Yeah, it's a little goofy. Frankly, I totally forgot about it until I sat down to write this blog. Oops.
So, in honor of Star Wars Day, I bring you a sneak peek at the new Disney Hollywood Studios Star Tours refurb. Enjoy!
For an indepth look at...well, a closed ride, check out this blog. There are a ton of pics, including one of a rather intimidating chair. Say what you will; I wouldn't mess with it.
Lastly, if there's anyone out there still unfamiliar with the plot of the original Star Wars movie, here's a fantastic YouTube recap--as told by a precious (and astoundingly eloquent) three year-old fangirl. Trust me, you don't want to miss this. Ole!
Turns out, yesterday (or today, since I write this stuff a day in advance, and sometimes things get all timey-wimey on me) was Star Wars Day. Each year, on May 4th, geeks like me are supposed to exclaim, "May the Fourth be with you!" to each other. Yeah, it's a little goofy. Frankly, I totally forgot about it until I sat down to write this blog. Oops.
So, in honor of Star Wars Day, I bring you a sneak peek at the new Disney Hollywood Studios Star Tours refurb. Enjoy!
 |
| Photo Credit: Disney Parks Blog |
Lastly, if there's anyone out there still unfamiliar with the plot of the original Star Wars movie, here's a fantastic YouTube recap--as told by a precious (and astoundingly eloquent) three year-old fangirl. Trust me, you don't want to miss this. Ole!
Subscribe to:
Posts (Atom)