Showing posts with label fashion. Show all posts

Tuesday, October 15, 2013

Wigging Out: How To Make Your Halloween Costume Wig Look Less Terrible

With Halloween rapidly approaching (and Christmas rapidly attacking, but don't get me started on that. We'll save that for another rant.), I'm sure at least a few of you are planning costumes, and that some of those costumes are going to need wigs...

...and that Halloween wigs suck.

I'm sorry, but they do. I'd imagine it has a lot to do with the fact that they're shoved in flat plastic bags (and that they tend to be poorly made to begin with...), but they never look anywhere remotely close to what's pictured on the model. Of course, when the price is low, I'm not going to expect too much, and I'm certainly not going to complain. The higher-priced ones irk me, but, again, that's another rant for another time.

Anyhoo, the point of this post is to give you some tips on styling your own cruddy party-store wig into something you'd actually be okay instagramming at a party. These are not "pro tips", but are some things you can do without having to buy (too much) special equipment. Heck, I'm not an expert. I wouldn't even know where to begin styling a high-quality wig. I have, on the other hand, had plenty of experience dealing with cheap synthetics.

So, a few weeks back, Thomas and I filmed a short about goofy supervillains. One of our actresses was supposed to be very glamorous in a retro-sixties way, and while she's gorgeous, I had no idea what I was going to do with her hair. It's absolutely lovely--don't get me wrong, this girl is stunning--but Thomas wanted a very specific look that would require extensions and pieces and about an hour longer than I had. I lost sleep over this, guys. Then, the heavens opened and the angels sang, and this appeared in the Halloween aisle at Target:


Yeah...it sucks. But it was eight bucks, and I could take as long as I needed to style it. You know, as long as "as long as I needed" was less than about 14 hours. I didn't find it until the day before the shoot.

To start, I pulled the wig out of the bag and surveyed the damage. It was...rough. I tried it on, and the bangs were completely uneven and reached my chin, with longer strands dangling lower. The waves and curls were practically non-existent, and what was there was scraggly. That said, the construction of the wig wasn't terrible. The layers were ugly, but they were even, and the color was beautiful. This was definitely a workable situation. I grabbed a hairbrush and started trying to unsnarl the knots.

Now, they do make wig combs for styling, but on a cheapie wig like this, I don't see the point in spending the extra money. I used a regular brush on my hair pieces for theatre, and those were worn and re-styled a lot. I never had any trouble with them, other than some shedding. As it was, this wig came out of the bag shedding. I worked in sections from the bottom up, brushed gently, and did not try to brush directly from root to end. Sure, I did end up with a tribble's worth of fake red hair in my brush in the end, but the hair didn't come out in clumps, or anything like that. In other words, use your own judgement. If you'd feel better using the pro brush, go for it. I just, personally, didn't see a need.

Once the knots were untangled, I set to work styling. First, I grabbed a wig head (mine was from Hobby Lobby, and I think around $10) and pinned the wig in place using big straight pins with colorful ball tips. I wanted to be able to find them easily when time came to put the wig on the actress. Then, I just started styling the hair as if on a real person.

The thing to remember is that this is not real hair. Synthetic hair is plastic and rather thick. It'll hold its shape pretty well without gel or mousse, or anything like that. Also curling irons and hot rollers (and heat implements, in general) will melt the strands. You can tease the hair to a certain extent, and you can roll it by misting sections with water, rolling on foam curlers, and allowing to dry. You can pin it, you can braid it, you can manipulate it into whatever style you choose, just don't use heat or products. Here's a picture of mine on the stand, rollers still in place: 
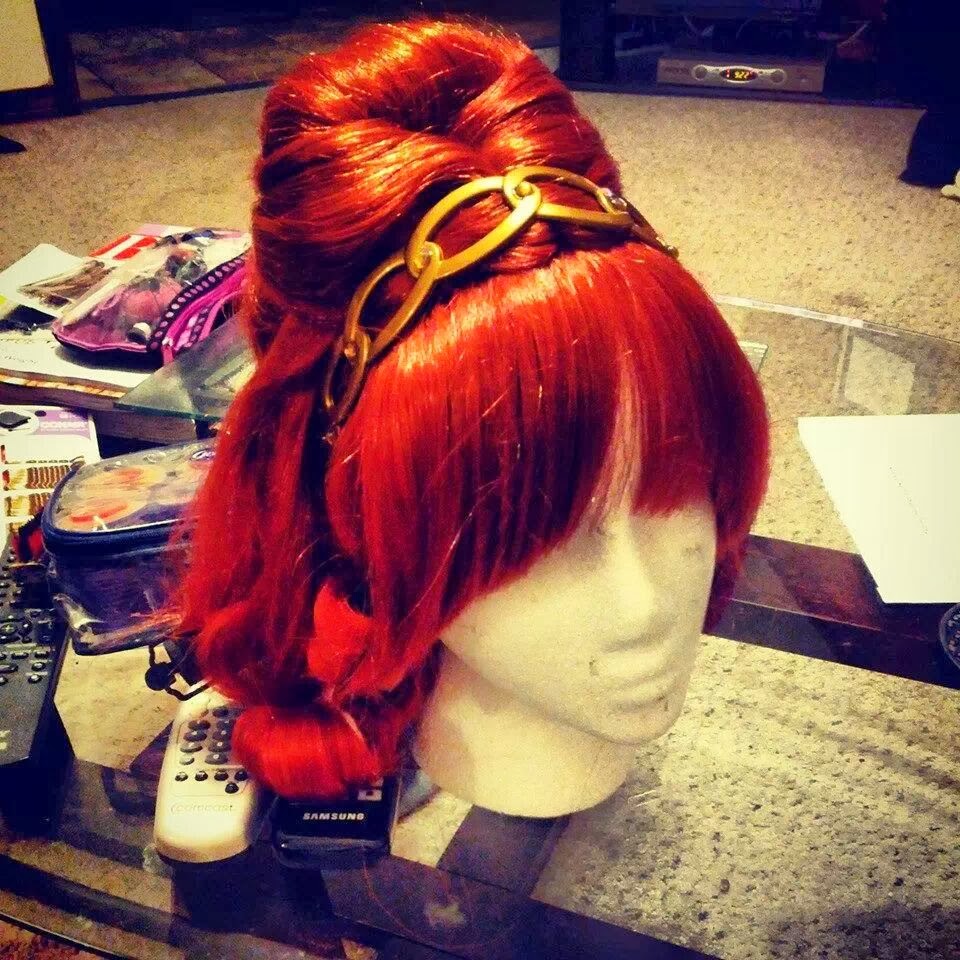

For this look, I kept the existing middle part and divided three sections off of it. These were clipped out of the way while I teased the crown into a bouffant. I wrapped the middle divided section over the teased portion and pinned the ends under to create the pouf. Then, I pinned the front sections around that, hiding all pins as I went. The ends were misted with water, then twisted and rolled on satin-covered foam rollers (from Sally Beauty Supply) to create waves, and then the bangs were trimmed to a more reasonable length, with the intention of finishing the trim once the wig was on the actress (and we all know about good intentions...). I added the headband the actress would wear to make sure the placement was about what I wanted.

As luck would have it, I wasn't even in the same building as the actress when the wig went on, and wasn't able to even see it in place until shooting had already started and it was too late to trim the bangs any further. Here is a really lousy, heavily cropped, way too dark shot of the actress wearing the wig:


Why yes, that is a clown on her left and a gorilla on her right. Why do you ask?

And here's the promo photo from the short. They're channeling The Breakfast Club. I think the wig looks particularly nice here:


Should anyone else need to wear this, I can wash it. I would have to be very careful with the pouf, since I really don't want to have to do that again, and it would definitely have to be re-curled, but washing these kinds of wigs is not a problem. Just use cool water and a very mild soap, like baby shampoo. Again, there are special wig shampoos out there, and you can use those if you want, of course, but the baby shampoo will work just as well, and it's a little more readily available.

So, in conclusion, here are the basic tips again:
  • If you use a regular hairbrush, start at the ends and work your way up. Avoid putting any stress on the roots. You can also use a professional wig comb, available at Sally Beauty and any number of online retailers for fairly cheap.
  • Do not use hair products. A little finishing hairspray is okay, but nothing else is necessary. It'll hold on its own.
  • DO NOT USE HEAT! EVER! THE HAIR WILL MELT!
  • Curl the wig by misting with water and rolling on foam curlers. Allow to air dry.
  • You can cut the wig, if necessary.
  • You can wash the wig with cool water and baby shampoo. Allow to air-dry, then re-style.
I hope this helped! Have a great Halloween, and be sure to share any cool wig pics in the comments.

Friday, June 21, 2013

Shorts, I Salute Thee

*Apologies to anyone who now has "Camp Anawana (We Hold You In Our Hearts)" stuck in your head. I'm right there with you.

It's crazy hot outside, and as today is the first official day of Summer (For reals? What season have I been melting in for the past month? Spring? Surely not!), I thought I'd share with you my favorite pair of shorts.

Photo Credit: Old Navy
These are fantastic, and here's why:

1. They're twill, so they look nicer than denim, breathe, and don't hold wrinkles. I can hang mine in the bathroom while I take a shower, and that pretty much takes care of "ironing".

2. They have a 3.5 inch inseam (they also come in 5 inch), which makes them short enough to still be young and hip (although, by uttering those words, I have just deemed myself neither), but long enough to cover the cellulite and allow me to squat down when necessary. And yes, sometimes it's necessary.

3. They're cobalt blue, which is too pretty for words, and have a crisp, white, somewhat exotic pattern. You can wear them with a white tank and be casual, or a flowy blouse for a dressier look. I have a neon yellow tee I'm dying to try with them. (They come in other colors, too, but the cobalt is my favorite.)

4. In stores, they're on sale for $15. I can't even...that's just...I bought two more pairs. I have no idea how I'm going to style hot pink or teal shorts, but I'm up for the challenge!

Have a lovely weekend, guys! Try not to evaporate in the heat.

Wednesday, March 27, 2013

The Most Spoiler Free Face/Off Finale Post EVER!

(ed. note: The Management apologizes for the lack of creativity in the post title. She's had a long day, and it's only 1:40pm. Thank you.)

Last night was the Face/Off finale, and I'm sure all of you were just as interested as I was to find out...what little body-conscious one-shoulder dress would McKenzie Westmore be wearing!

'Cause you knew she would.

And my favorite contestant got ousted last week, so I no longer cared.

So, in honor of Ms. Westmore, I have found a budget-friendly, body-conscious, almost one-shoulder dress in her signature lavender. I'm just going to leave it here:


Photo Credit: Forever 21

Now, if you'll excuse me, I'm going to go nosh on some rice cakes and try to calculate the exact number of Spanx I would need to wear to pull off that look. Have a great Wednesday!

Friday, September 14, 2012

Inspiration: Zombie! Pre-Halloween "Going Out" Look

Tonight, Thomas and I are hitting the local Art Walk. It's a monthly event where different visual artists, performers, and arts organizations more or less take over the downtown area. Handmade items are sold from sidewalk vendors, opera is sung on street corners, movies are shown in the middle of a Square, and wine and cheese flow forth from gallery receptions. All in all, it's a good time. We'll be there representing Fighting Owl Films, so I had to get a little more dolled-up than usual, and in a way that helped make it clear what our organization does. So, I pulled out my zombie headband. That should do it.

The zombie headband, in case you're wondering, is this absolutely, freakishly adorable handmade piece I picked up at another Art Walk last December. The artist doesn't have a website, or I'd be hawking it like mad because she's insanely talented. When I saw that she had sweet purple zombies for sale, and I had a movie out that featured sweet purple zombies, I knew we were a perfect match. Here's the piece:
 
I love the dangling little button eye!!!! Squee!!!

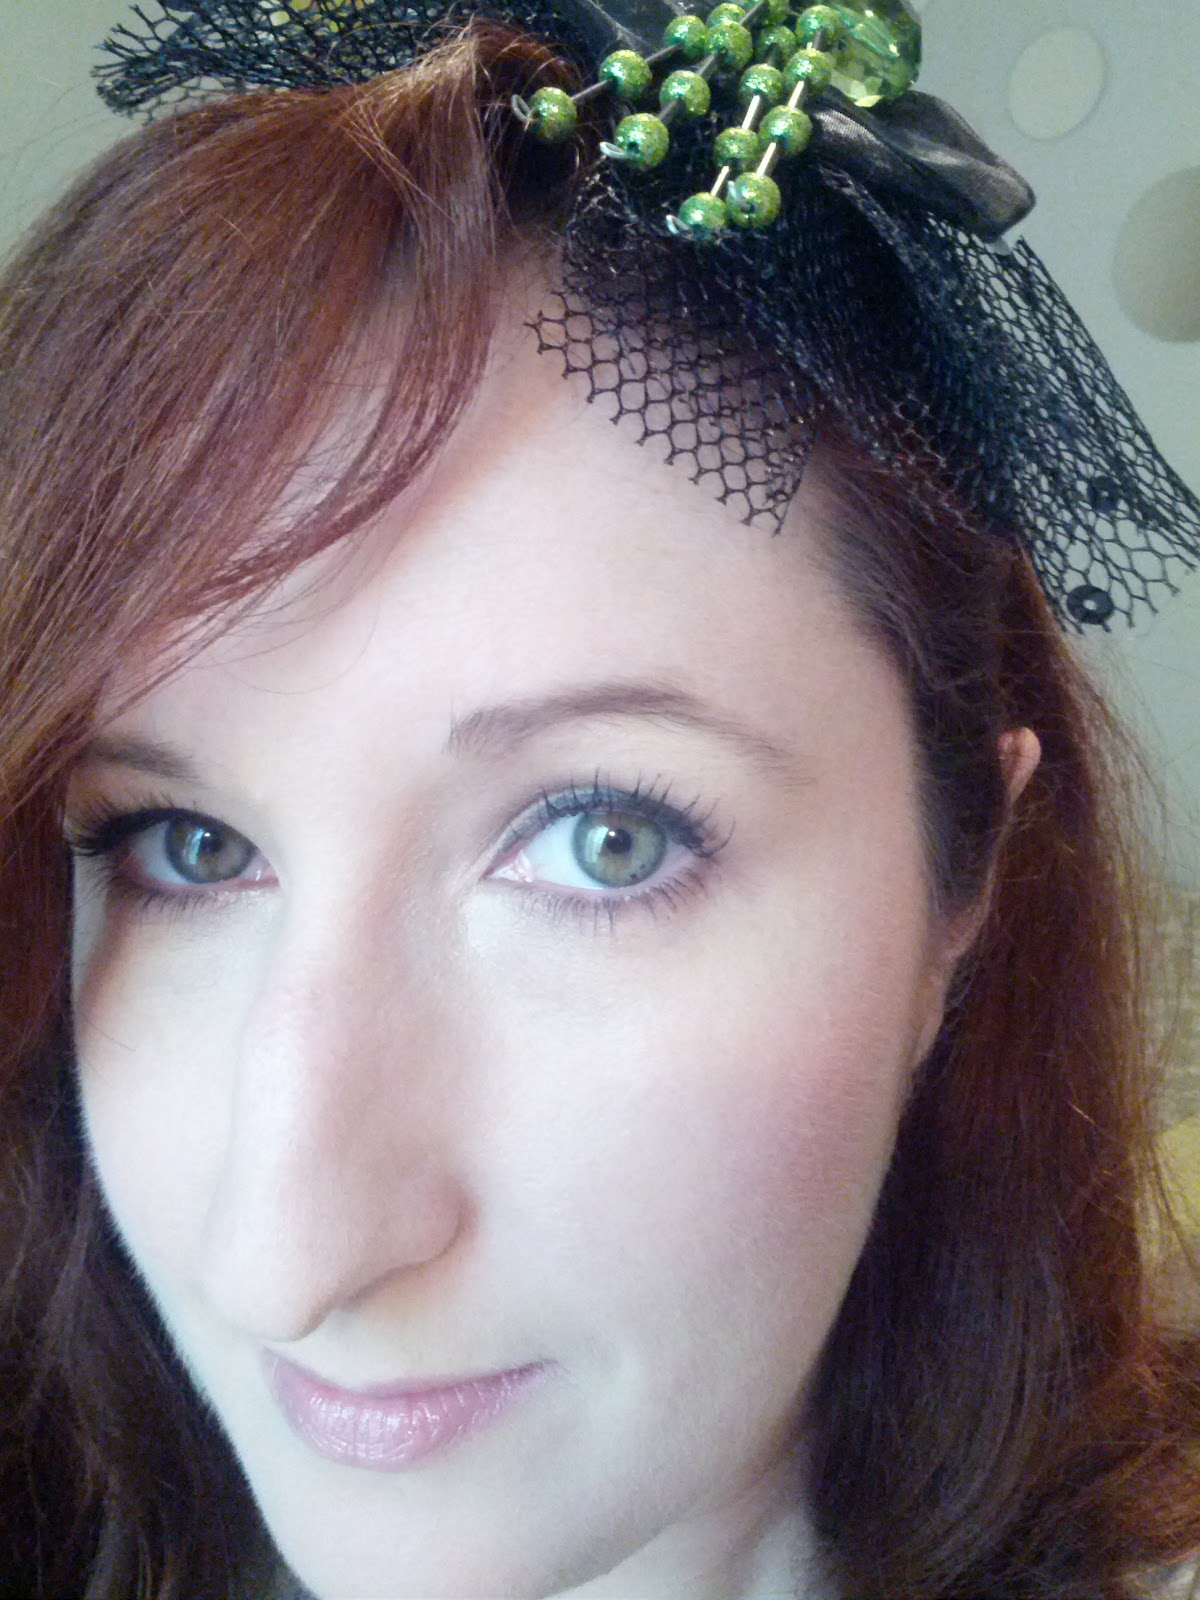
Once I knew that I was going to have purple and red in my hair (and the rest of the outfit consists of a black shirt and blue jeans), I decided to incorporate those colors into my makeup for a dramatic, artsy, but still classy look. God, help me. Here's what I came up with:


Products Used:
Touch In Sol Feels Like Honey Moon primer
MAC Studio Sculpt foundation
Maybelline Age Rewind concealer
Benefit Creaseless Cream eye shadow in Silver (lid/primer)
Stila eye shadow in Moxie (crease)
Urban Decay eye shadow in Grifter (blending)
Urban Decay 24/7 Glide-On Pencil in Zero
Buxom Lash mascara
E.L.F. Brow Kit in Medium
MAC Cream Color Base in Virgin Isle (blush)
Rimmel Stay Matte powder in Transparent
Benefit Watt's Up highlighter
Revlon Colorburst Lip Butter in Cherry Tart


They eyes took zero time. Seriously. Silver for the primer/lid color, then add Moxie to the crease and outer V-area, and blend it up with Grifter (which is full of pretty silver glitter that shows up in person, but not in this picture. Of course). Run Grifter under the lower lashes, then run Moxie over that line to the halfway point. Line upper lashes with Zero and wing out slightly, then run it under the lash line about a quarter of the way across. Add Watt's Up to the inner corner and under brow bone. Done.

If you're curious about how I wore a cutesy headband after age 30, here's how, and it could not have been easier. I started with wet hair and spritzed in a good leave-in conditioner. Then, I added a volumizing mousse to the roots and gave it a rough blow-dry. When the hair was just slightly damp, I sprayed down the ends with a sea spray for texture, and continued to rough blow-dry the rest of the way, scrunching the ends as I went along. Once the hair was completely dry, I pulled it up into a messy, high ponytail, with a little volume at the crown. I didn't tease the crown, but left room for it to pouf up a little when I pinned in the bun later. To create the bun, I used a teasing comb to tease the entire ponytail in one-inch chunks. Then I twisted the chunks together loosely and formed a circular ballerina bun, poufed up the crown, and pinned. The headband went on after, and I tucked the ends into the hair behind my ears. I finished the look by lightly spraying with anti-humidity (ha!) hairspray, just to knock down any frizzies that shouldn't be there. Messy is one thing. Frizzy is something entirely different.


See, the band is pretty far back on the head, which makes it more like an fashion accent, and less like something a schoolgirl would use to keep her hair back during P.E.


This shows how it looks from the front, as well as a close-up of the bun. Added bonus: Erin looking like a goober. You're welcome...

Thursday, August 9, 2012

Buy or DIY? Halloween Spider Headband

Yes, I realize it's only August, and the beginning of the month, at that, but over the weekend I saw that Michael's already had some Halloween merchandise out, and there was a spider headband too cute to pass up!

Way cuter than a witch's hat, any day.
The headband isn't available on the website (actually, nothing is. You have to go to a brick and mortar store to make any purchases), but I wanted to share it with you, in the event you have a Michael's nearby, or are crafty and want to DIY your own.

It's like a fascinator, but on a headband. It's cocked to one side.
It doesn't appear to be a difficult project, if you choose to make one. The base is just your basic, black satin headband. It looks like some sequinned tulle was either stitched or glued on to the band, then topped with a black organza bow and a beaded spider. The spider might be a challenge to replicate, but that could just be your excuse to get really creative and come up with your own design! Maybe you could go crazy with curling ribbon? How about some grinning felt pumpkins? Or, you could use the basic design to come up with something not even remotely Halloween-y. I can see this becoming a glamorous, feather and crystal covered evening accessory, without having to spend too much money or exert too much effort.

Close-up of the construction. Sequinned tulle, ribbon, ornament. Easy peasy.
However, if you're like me and burn yourself everytime you think of plugging in a glue gun, the Michael's I visited carried these in the lime I got, red, and hot pink. They also had variations with skulls and pumpkins, and all were $9.99. I used a 40% off coupon to snag my headband for around $6.00. I think it'll look really sweet with my Little Mermaid t-shirt for Mickey's Not-So-Scary Halloween Party. Happy Haunting!

Tuesday, August 7, 2012

Mystery Solved!: StyleMint Mystery Bag Review

Quick ranty question before I get into today's entry: Why has no one invented tinted sunscreen? Not tinted moisturizer with SPF, not bronzer with SPF, but actual tinted sunscreen? That way, you could put it on from tip to toe and have perfectly even skin. No more messing around with "skin perfectors" or "tone-enriching ribbons" (a.k.a. glitter); just a sheer tint in the sunscreen itself. Why does that not exist? /end of rant.

Okay, so yesterday I received my StyleMint Mystery Bag in the mail, and since the last review I did of a Mystery Bag was so popular, I thought I'd do one on this bag, too. Plus, I've noticed that a lot of the ladies on the StyleMint Facebook page have been interested in seeing how the shirts look on "normal" people. Well, I'm pretty average, so I took some photos that you can use as reference, if you want. I'm 5'3", and on the StyleMint sizing guide, I'm a 3 (Medium).

First, a review:
StyleMint runs this kind of promotion about once a quarter. Normally, they coincide with a holiday or special event (i.e. the Academy Awards, Halloween, Christmas), but this one was just for the fun of it, I guess. I expected to hear, somewhere along the way, that they were Olympics-themed, but that didn't happen, and that's fine by me. The themes never mean anything, anyway. This "bag", like all the ones before it, came as an envelope stuffed with brown paper-wrapped shirts. No bag, no theme, no fuss, no muss. This is not a criticism, by the way.

In the past, the bags have tended to be either a shirt and a JewelMint item (JewelMint is a sister company, and normally runs a similar promotion alongside the StyleMint one), or a shirt and another StyleMint item (sunglasses, leggings, tote bag, etc.), with maybe a coupon code or two tossed in for good measure. That's not a bad deal for $29.99, and I've been happy with those bags in the past. This bag, though, took the cake. For the price of one shirt, you received three StyleMint items. Now, those items could be pretty much anything in the StyleMint catalog, but you'd get three of them, so the bag was definitely more than worth the pricetag.

Now, some ladies have complained that they didn't like what they got. You don't get to pick your items, so you could end up with things that aren't to your taste. One lady even received an item she'd previously returned (I mean, not the same exact shirt, but the same style of shirt. It was a new shirt. Oh, you know what I mean). That is the gamble. That's also why you get so much for so little, so it's a trade-off.

I'm thrilled with my bag. I now have six StyleMint shirts and StyleMint dress, and all but one shirt and the dress were Mystery Bag purchases. They're all excellent quality, feel amazing, and look really cute on. Sure, you might have to put a little more thought into how you'll wear your shirt, but I think that just adds to the fun of the bag. My only complaint is with the shipping. I never got a tracking notice, and it's not the first time. All I had to do, though, was ask customer service, and they got the notice to me ASAP. I will say that StyleMint (as well as JewelMint) has excellent customer service. I'm continually impressed by them. The shipping is generally pretty slow, but the customer service makes up for it.

So, let me show what I got. These pictures are not styled in any way. I just threw the shirts on over a pair of Sweetheart jeans from Old Navy and a pair of CL by Laundry flats. I also didn't try the shirts on before taking these photos. We're all seeing them for the first time together, folks.


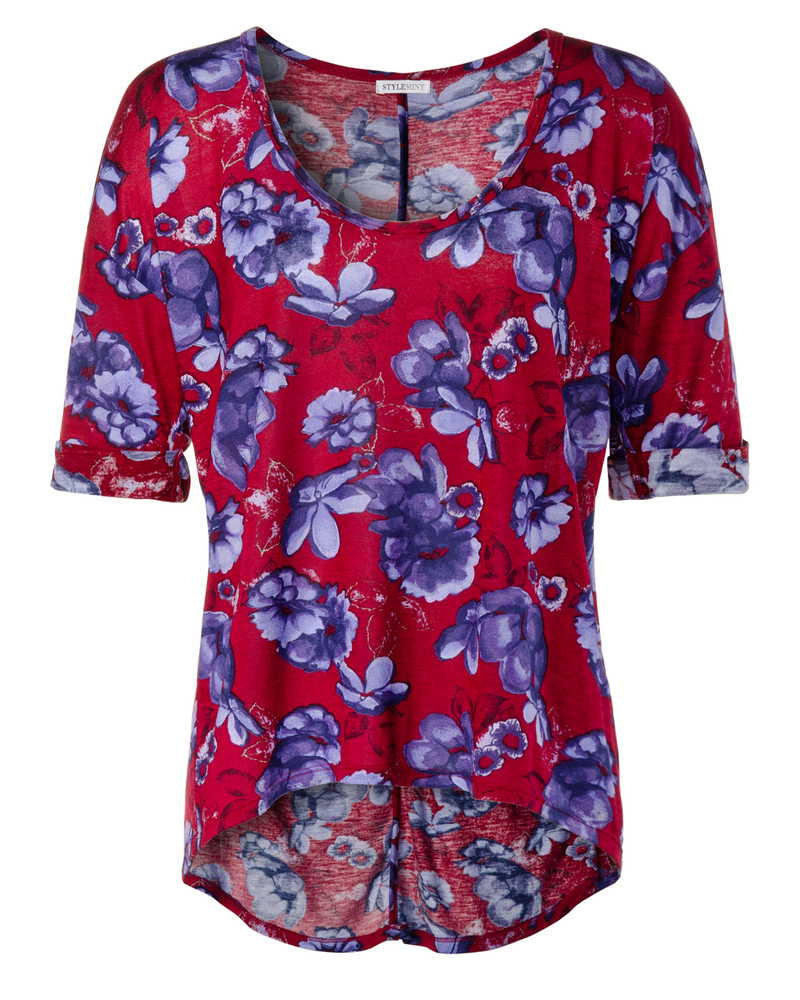
Photo Credit: StyleMint
 The first one I tried on was the Brooklyn T. Admittedly, when I first saw this, I was a little less than impressed. I haven't been into fussy florals since the very early 90s, when none of us knew any better. What was I going to do with this old lady shirt?


I was going to rock it, that's what! This may be my favorite shirt out of the bunch, now that I've tried it on. I wore it to work today, that's how much I love it. I shot from the side, instead of full-on, because I wanted you to see how it's lower in the back. For me, it's a really flattering cut. This is very lightweight with a wide scoop neck, so you could layer with it, but it's dark enough that you don't need anything underneath it. The red is also much more muted in person than in photographs. It's a lovely shirt, and nothing like the chintz sofa cushion I thought it was going to be.


Photo Credit: StyleMint

Next up, the Savannah T in black. I immediately liked how the stars are made to look like sketches and doodles, and not like cookie-cutter stamps. To me, that's more interesting.


I like this a lot, but it's not grabbing me the way the Brooklyn T did, which is weird, because, between the two of them, I'd have picked this from the online pictures before I'd have picked the Brooklyn. It's just a basic tee, albeit a really soft and high-quality basic tee. Scoop neck, level hem. I think this is going to look really cute layered under a black cable-knit hoodie this Fall and Winter.

Photo Credit: StyleMint
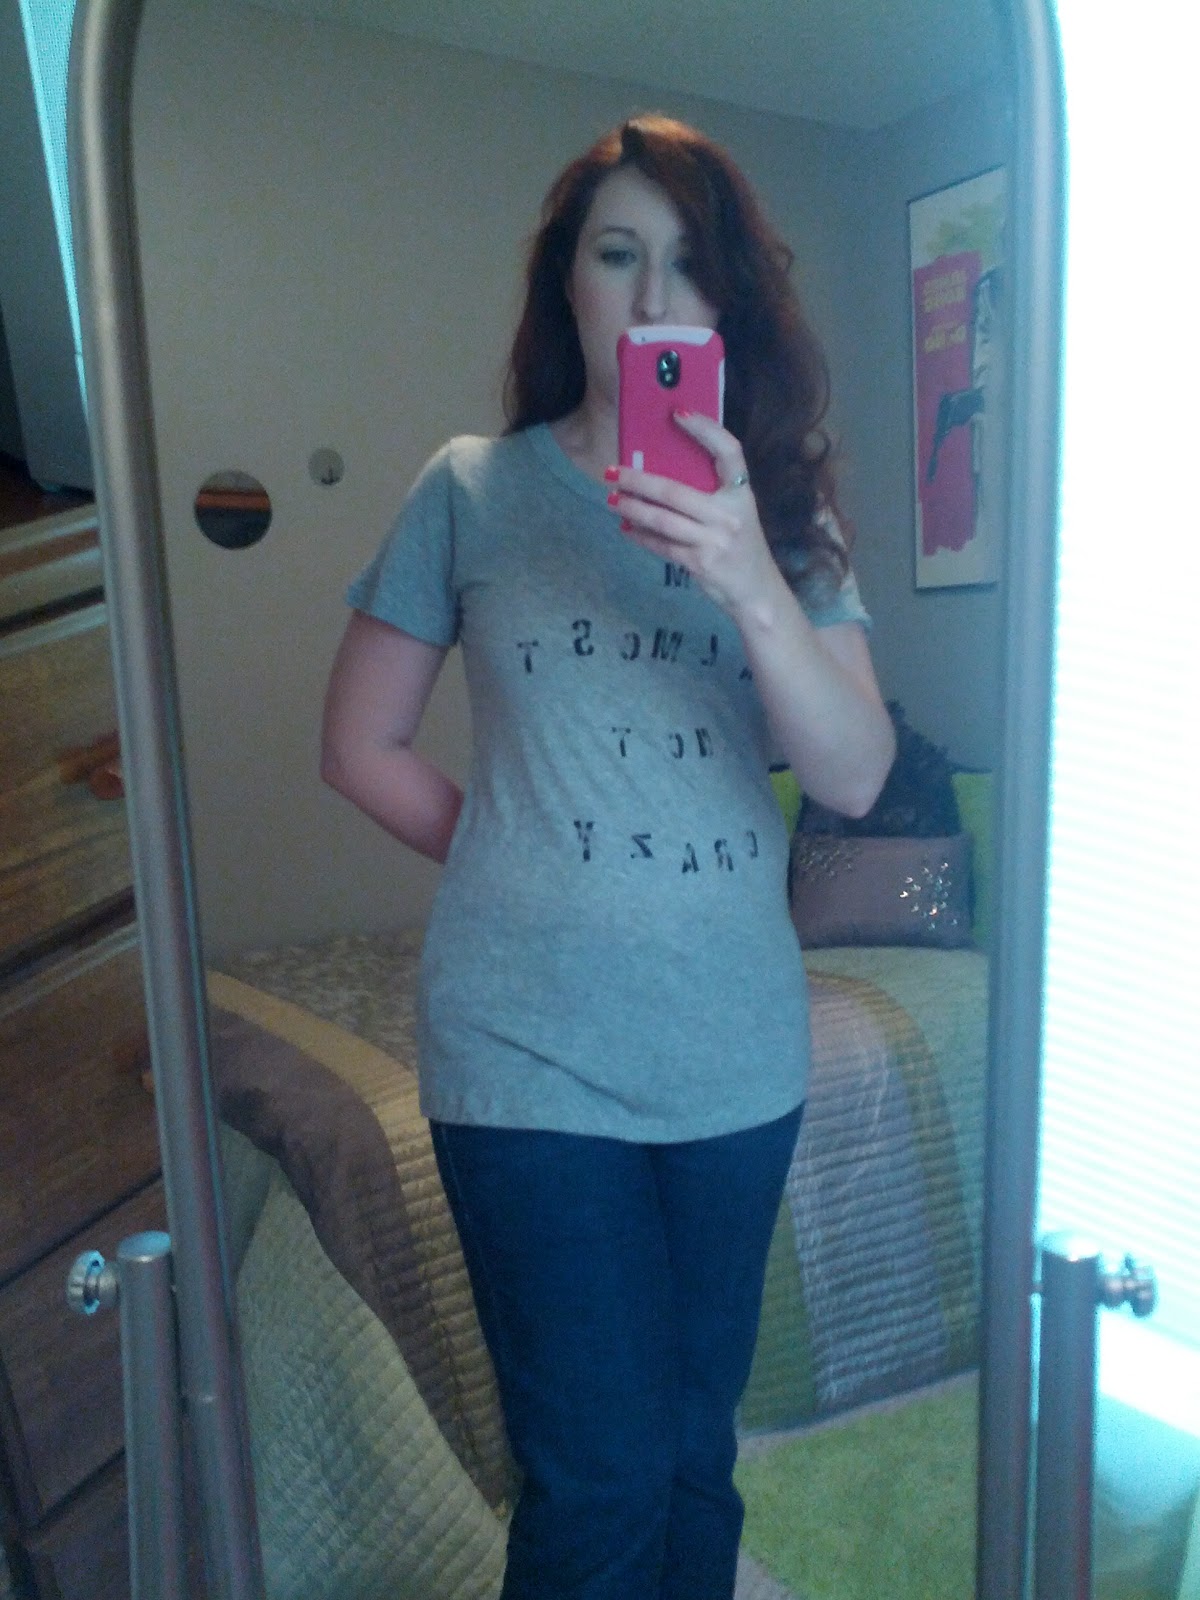
This last shirt just made me giggle. I need to wear it on-set, sometimes, or maybe to rehearsals. Heck, I need this tattooed onto my forehead. I showed it to Thomas and he laughed out loud. In case it's too difficult to read, it says, "I'm Almost Not Crazy".

Okay, there are two shots here. This one shows how the lettering falls, and the one below shows the snug fit and sheerness of the tee.


I love the way this is made. The material is super-soft and lightweight, and it feels like it custom forms itself around your body (I know it doesn't, but it's just that soft and flexible). It's also cut with a longer line, so you never look short-waisted, or feel like you can't bend over with confidence. I hate shirts that creep up in the back, and leave you wondering if you're *ahem* exposed anywhere you shouldn't be. No worries with this.

So, that's my Mystery Bag, folks, along with my thoughts and, hopefully, a little sizing reference. I apologize for all the camera-in-the-face photos, but you work with what you've got, I guess. Did anybody else get a Mystery Bag? What did you think? Let me know in the comments.

Tuesday, July 31, 2012

Disney Artist Collection Heads To Target

Photo Credit: Target
This is not a real post; just a head's up. Disney has just released its "Artist Collection" at Target, and it's really, really cool.

The collection is a line of fashion tees and sweats (yes, fashion sweats. Sounds like an oxymoron, but these are too darn cute) featuring both favorite and slightly more obscure Disney characters. Think: Oswald, Cleo, Figaro, Sleepy, Butch, that girl fawn from Bambi (I should have my Disney fan card revoked), and images from Silly Symphonies. Mickey and Minnie also make an appearance, and I left the store last night with a Tinkerbell sweatshirt. Prices range from around $12 up to around $25. I'll be honest, I can't remember off the top of my head, and the Target website isn't being helpful. The sweatshirt I got was $19.99. Items are available for women, men, and children, and selection varies by store.


Tuesday, July 10, 2012

Not Just For Air-Conditioners and Prom Dresses Anymore

I am a firm believer in duct tape. I've used it to spike stages, hold up green screens, re-attach a co-star's head (sorry, Herbie), replace a suitcase wheel (that one took some doing), create the form for a dummy...pretty much anything you could think of. I've also seen my share of duct tape fashions. Heck, the folks at Duck Duct Tape host a contest every year to see who has the best duct tape Prom attire, and let me just say, those kids go all out, and come up with some extremely creative entries. Unfortunately, most of the duct tape accessories I've seen floating around the web have been a little...well, bland. Cute, but kind of plain. Then, this showed up on my Facebook feed:
Photo Credit (This and All): Kenzie Tapia
That is decidedly not bland. Here's a close-up of the flower detail, along with the inner pocket and lining:


This cutie was made by Kenzie Tapia, an artist and dance teacher. I love her choice of colors, and the floral touch sends this purse from crafty to couture. It's just darling, and the second I saw it, I knew I had to share it with you guys. Here's my other favorite, the matching ruffled wallet:


Squee!! Those little ruffles are so sweet, and the duct tape gives them an almost leather-like appearance. Of course, it's fully functional, with pockets for cards and a cash compartment.


If you are interested in seeing more of Kenzie's work and maybe picking up an item or two, please check out her Facebook page. Also, if you guys know of any independent artists that you would like to see featured on Adorable Napalm, please let me know. We're all in this together!

Tuesday, June 26, 2012

Just When You Thought You Had Enough T-Shirts...

I want to be Ashley Eckstein when I grow up. Yeah, I know, I'm 32, but that hardly makes me a grown-up. This woman is amazing. She's a talented actress and voice artist, gets to hang out with the Star Wars crowd for a living, and designs some of the most beautiful "geek tees" I've ever seen. Recently, Her Universe (Eckstein's design house) branched out to partner with SyFy for some adorable Warehouse 13, Battlestar Galactica, and SyFy Original Movie products. Starting July 11th, though, Her Universe will be broadening its own universe by taking on that captain of time and space, himself, The Doctor.

I am going to be so very broke.
 
The new Doctor Who line currently consists of three shirts, and I can't decide which is my favorite! Two of the shirts are v-necks with flattering, elongated torsos. The TARDIS blue shirt features a white sketch of the little blue box in one corner, with the curlieque inscription, "Something Old, Something New, Something Borrowed, Something Blue". A black tee shows off a pair of bright red killer pumps, bearing the words, "Hell in High Heels" on one sole, and a minature TARDIS on the other. The last shirt is a navy, wide-necked box-tee. The Van Gogh painting of an exploding TARDIS that was so prominent at the end of 11's first season is centered on the front, detailed with gold foil. Doctor Who shirts are $28 each, and will be available online beginning July 11th.

Photo Credit (All): Her Universe


Friday, May 25, 2012

Frugal Friday: Window Shopping Challenge!

Happy Friday-Before-A-Three-Day-Weekend!! Major sales happening over the next few days. I won't bore you with those, since they'll all but slap you in the face if you're out and about. Instead, here's the scoop on some extra special savings that you might not know about. Let's get to it!

TooFaced: Free Shipping all weekend with code THANKYOU12. Exp. 5/28.
Sally Beauty Supply: Take an extra 50% off all red tag clearance with code 555100. Exp. 5/28.
Bath and Body Works: $1 Shipping on orders over $25 with code MEMORIAL25. Exp. 5/28.

Question: has anyone here ever paid full price for anything at Aeropostale? That store seems to be in a state of perpetual clearance, and that's just fine and dandy, dandy and fine with me. Today, I looked and about half the store was 70% off. Just for giggles, I hopped on Polyvore and gave myself a challenge: put together a Memorial Day BBQ outfit for under $50, using only Aeropostale items. Here's what I came up with:


$50 Memorial Day BBQ Outfit


Not bad, if I do say so, myself. Dress, shoes, bag, and two accessories (that ring is precious, and I like the way the curve in the sunglasses mimics the curve in the bodice), and the total came to $44.10. For coming in so far under the imaginary budget, I imaginarily treated myself to an imaginary lip gloss, bringing the final bill to $49.60. Heck, I'm so proud of myself, I may go try this on at the real Aeropostale this weekend. You can't beat twelve bucks for a dress.

I hope you all have a truly wonderful holiday, and please take a moment to remember the reason for the day. See y'all next week! If you're interested in any of the products mentioned, there are links below. Bye!

Nyx lip gloss
$5.50 - nyxcosmetics.com

Floral Halter Dress
$12 - aeropostale.com

Aero Surf Vertical Tote
$10 - aeropostale.com

Jelly Quarter Strap Sandal
$7.35 - aeropostale.com

Vented Shield Sunglasses
$9.75 - aeropostale.com

Sparkly Jelly Ring
$5 - aeropostale.com

Thursday, May 10, 2012

What To Wear? It's a Mystery!: StyleMint Mystery Bag Reveal

There's a reason I'm an actor and not a model. Well, a few reasons actually. For starters, I'm 5'3". Smurfs pat me on the head. Then there's the fact that this is one of my better pictures. It's fuzzy, and I'm making a weird face. Out of about ten shots, that was the keeper. Jealous?

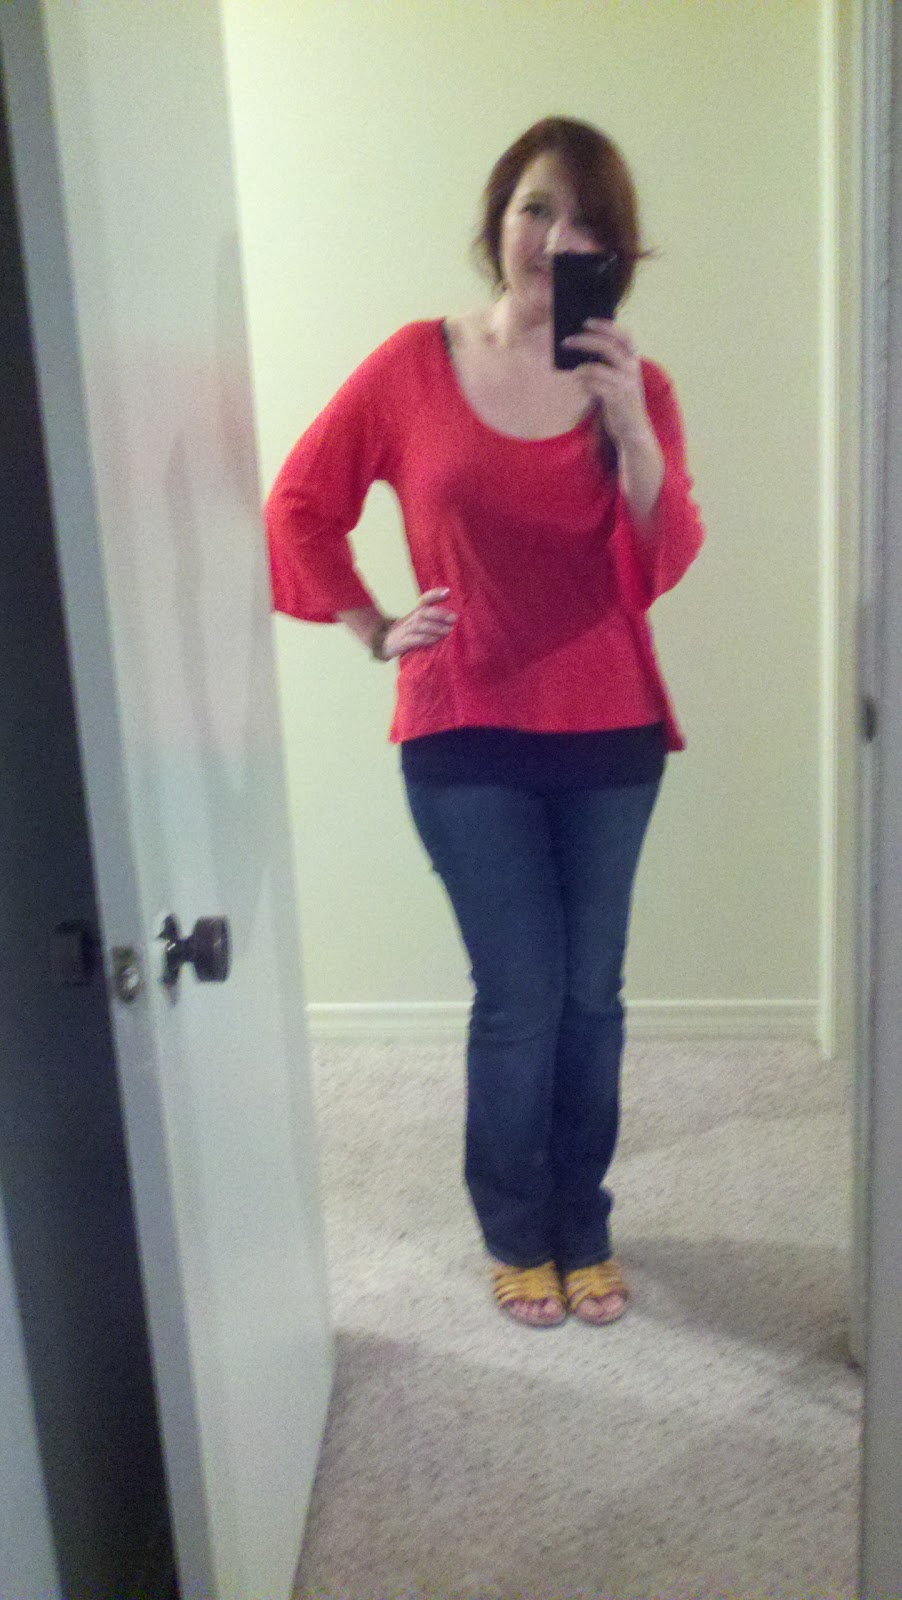
Now, I don't make a habit of taking pictures of my outfits (though, with results like this, how could I resist?), but I took part in the recent StyleMint Mystery Bag, and thought I'd share with you what I got.

If you haven't heard of the Mystery Bag, here's how it works: Once every couple of month (generally, around a holiday or major fashion event--i.e. Oscars), the Mints (StyleMint, Jewelmint, etc.) will host a Mystery Bag event. Typically, you'll receive at least two items, which makes the $29.99 price well worth it. It's the same as getting two items half off, and I call that a bargain. It's, actually, about the only way I shop the Mints. Please note: this is a true grab bag, so you could end up with anything. You might get two shirts, a shirt and a piece of jewelry, several items, or stuff that you really don't care for. There might be promo codes or gift cards involved, or you might end up re-gifting everything. It's a gamble, but with very few exceptions, I've always been really happy. I normally end up with things I'd never pick out for myself online, but fall in love with in person. To me, it's a great way to update your closet on the cheap, and forces a little creativity in the process. I've rediscovered stuff that I already owned but rarely wore because I needed something to go with a grab bag purchase. (In case you couldn't tell, I recommend the Mystery Bags.)

So...what did I get? Well, I ended up with the amazingly soft Tango Red Albany Tee (and yes, you do get to specify size. I'm a "3" or Medium/Large because they tend to need layering). It's a bright orangey red that was already one of my favorite colors. I also scored this surprisingly well-made tote bag. I say surprisingly because it's very lightweight, but durable. This is going to be one of my Summer staples, I can tell. I'm not a fan of having the logo stamped across the front, but I do love the zippered pocket, which is perfect for keeping my cell and keys from swimming around with all my other junk.

Plus, since part of the fun of the Mystery Bag is figuring out how to incorporate the new pieces with what you already own, I thought it'd be fun to work in items from other Mystery Bags. You can't tell in the fuzz-ball picture, so I Polyvored (is that a word? Is now!) it all out for you below. I accessorized with JewelMint's Zoe Bracelet and Steampunk (no, they're not, but good try) Earrings. Neither of those items were on my Favorites list, but now that I have them, I wear them all the time! Who knew?

Anyway, I layered the shirt over an Old Navy cami, and tossed on jeans and some old Mossimo wedges from Target. To finish the look, I sprayed my hair with Bumble & Bumble Surf Spray for texture, and wove it into a messy side braid. For my makeup, I focused on flawless (ha!) skin and kept color natural and minimal. I love this look, and can't wait for the next Mystery Bag offer to appear in my inbox!

What do you think? Leave your comments below, and be sure to follow me on Polyvore!

Tuesday, May 1, 2012

Polyvore Fantasyland: Poolside Princess

I'm really thinking about making this a new segment. Maybe not weekly, but every now and then. What do you guys think?

Anyhoo, Target has this really cute cover-up for $19.99. It's sheer, but offers enough coverage that you can wear it into a shop or through a theme park without feeling exposed. It's also dressier than most cover-ups, so it would be appropriate for a Mothers' Day cookout, or something like that, where you want to look a little nicer than if you'd just tossed on a t-shirt over your suit. Using that as inspiration, here's my suggestion for one way you could wear it. I thought a pop of one single color would work well with this black, white, and gray sundress.
Poolside Princess

Poolside Princess by adorablenapalm featuring a waterproof mascara

The swimsuit I chose for this look is from Old Navy (so, affordable! Yay!), and is a bright tomato red. I particularly liked the O-ring detail on both top and bottom. It's a little detail that adds a lot of sophistication.

If you're by the pool, you don't want to have to worry too much about ruining your shoes. These flip-flops from H&M will only set you back a few bucks (they're in pounds, here, but they're about the same here in the states, if you're lucky enough to have an H&M near you. I'm not. Oh, well...).

My go-to hairstyle, these days, is a low side-bun with a flower accessory. I sing a lot of weddings during the Spring and Summer months, and this is the easiest to throw together quickly. Added bonus: it doesn't matter if it frizzes or is a little messy; it still looks polished.

Whether you jump in the pool or lay out in the sun (slathered in sunscreen!), you don't want your makeup to run. Buxom's eyeshadow in Pug (gorgeous pewter cream shadow) won't budge, no matter what the humidity. Brush on a little waterproof CoverGirl mascara and slick on some Buxom Bora Bora lip balm, and you're good to go!

Swimwear
$18 - target.com

Old Navy halter swimwear
oldnavy.gap.com

Old Navy halter swimwear
oldnavy.gap.com

H&M flat heel shoes
£3.99 - hm.com

Hair clip accessory
mydivascloset.com

Buxom waterproof eyeshadow
$17 - sephora.com

COVERGIRL waterproof mascara
$6 - covergirl.com

Buxom lip treatment
$15 - sephora.com

Related Posts Plugin for WordPress, Blogger...